Custom Domains in Netlify
Now that we have our first deployment, let’s configure a custom domain for our app through Netlify. This step is assuming you have a domain in Route 53 back from the first part of the tutorial.
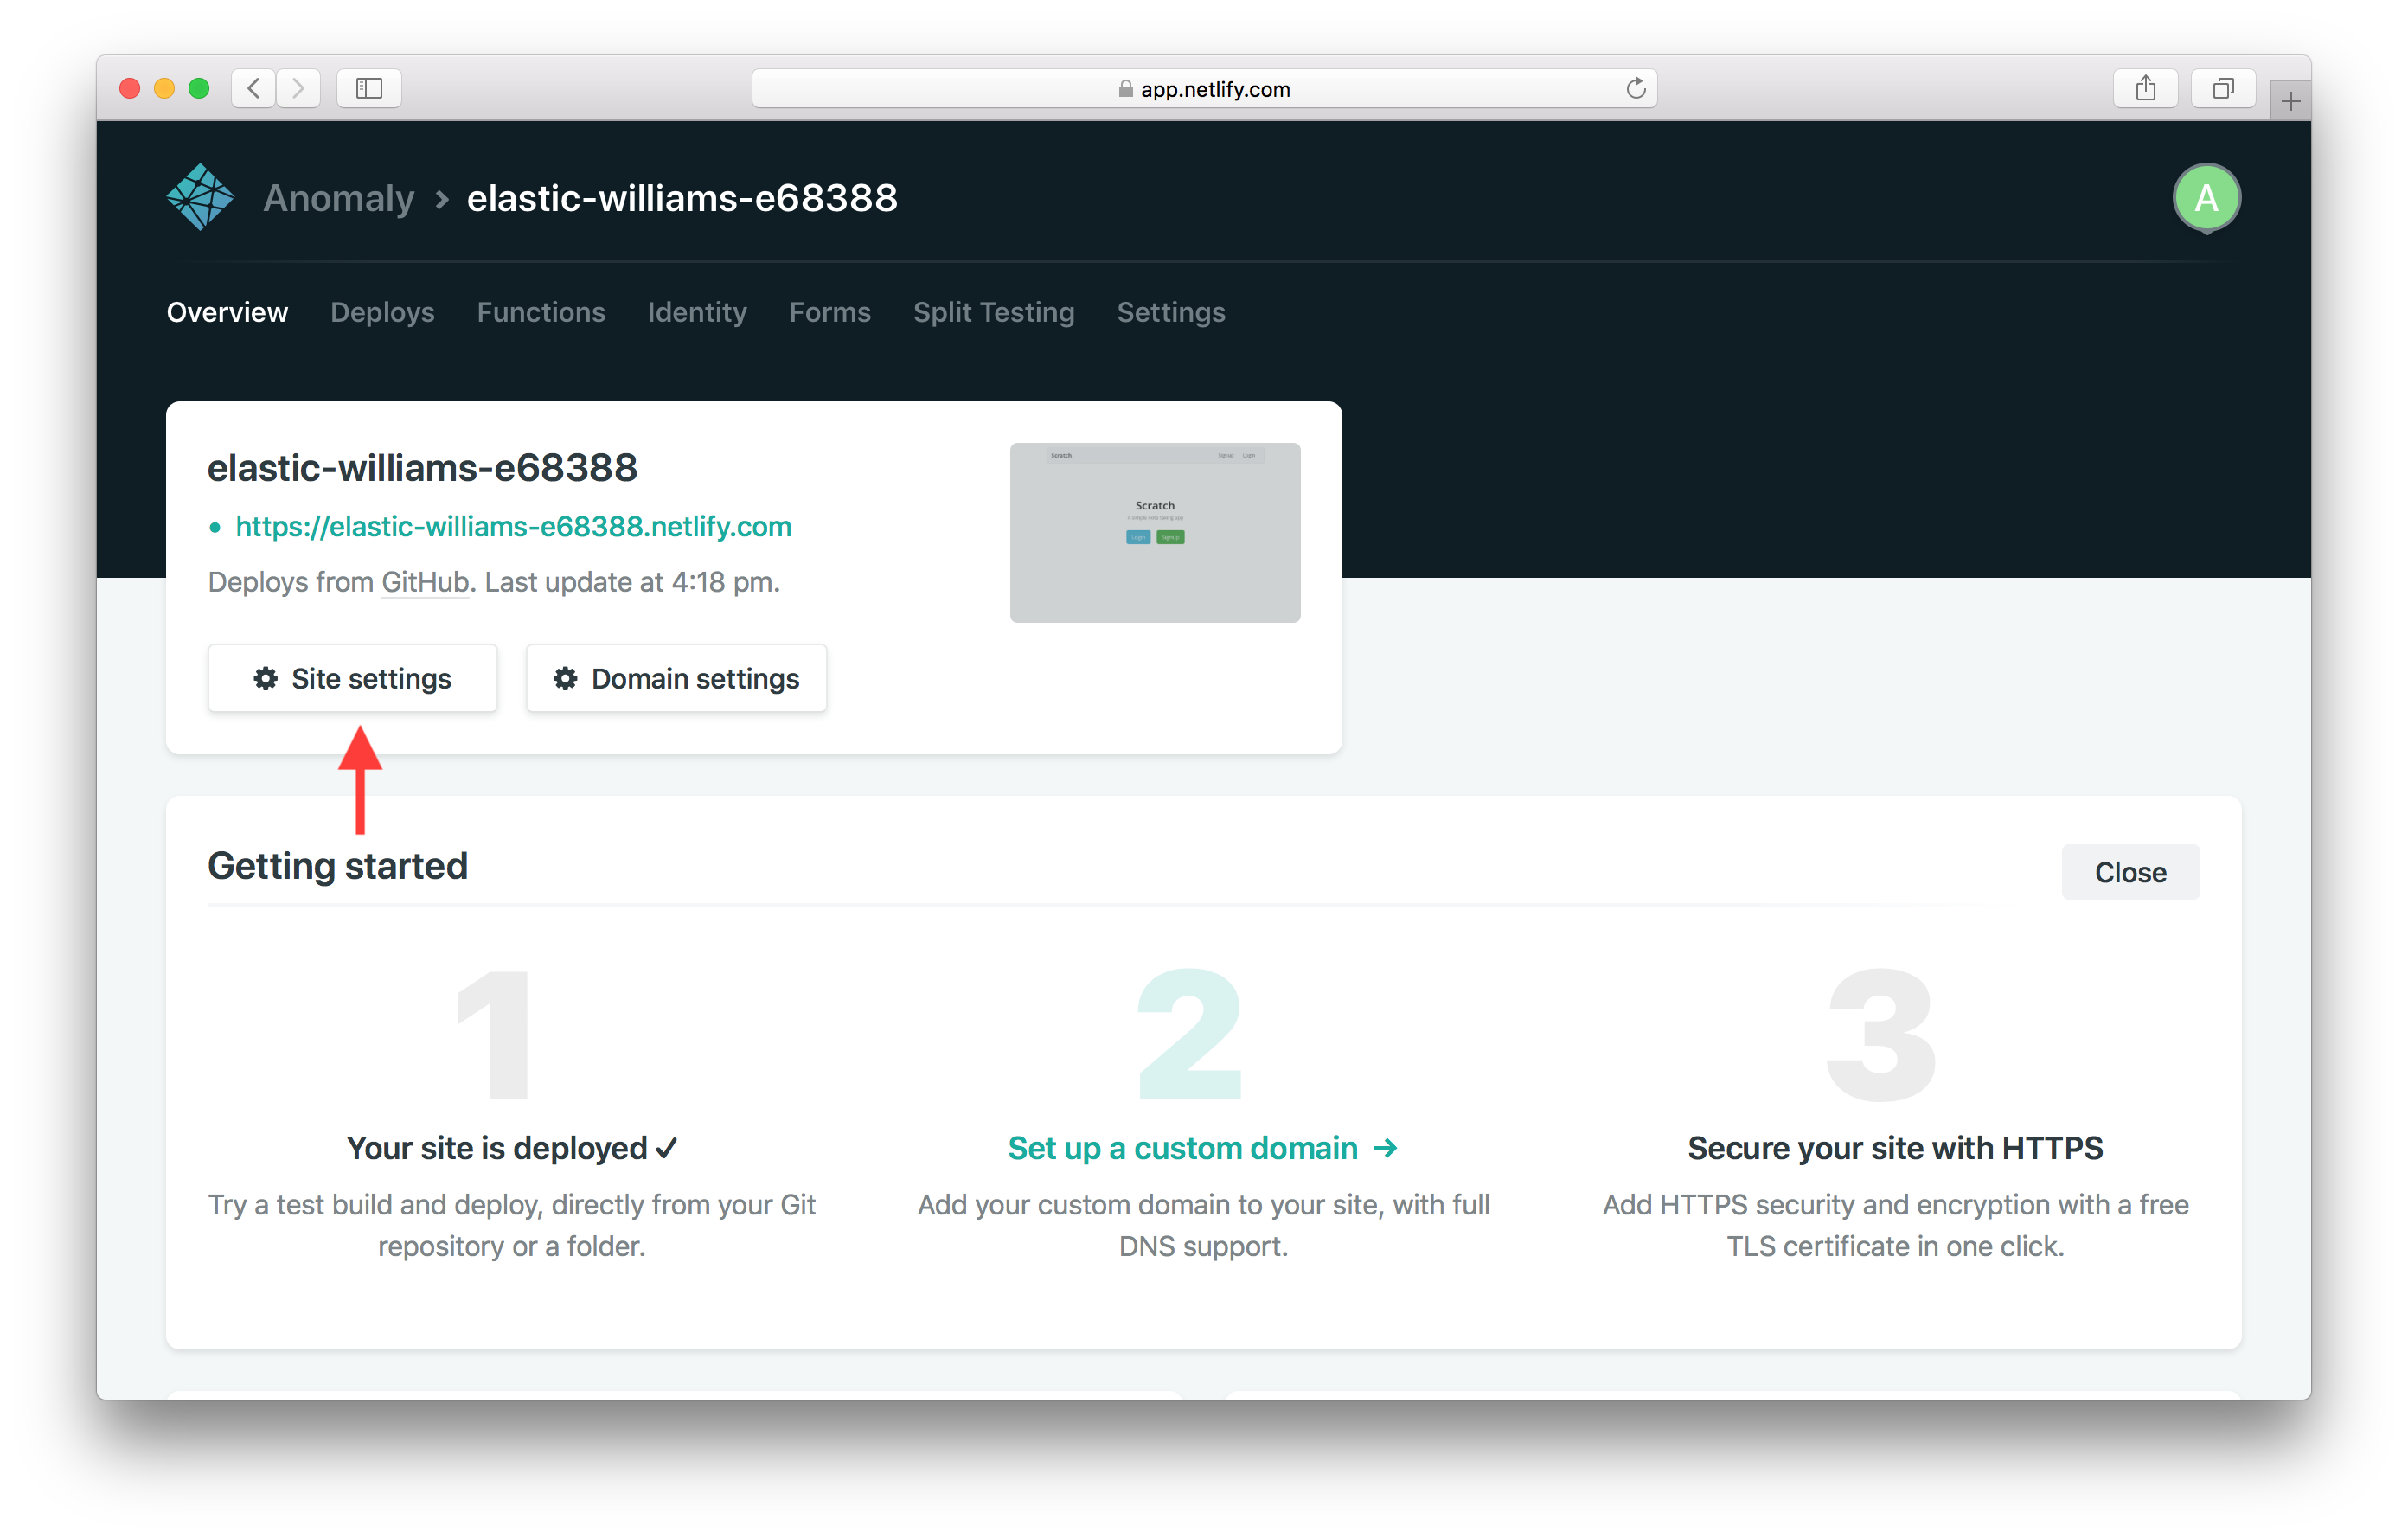
Pick a Netlify Site Name
From the project page in Netlify, hit Site settings.
Under Site information hit Change site name.
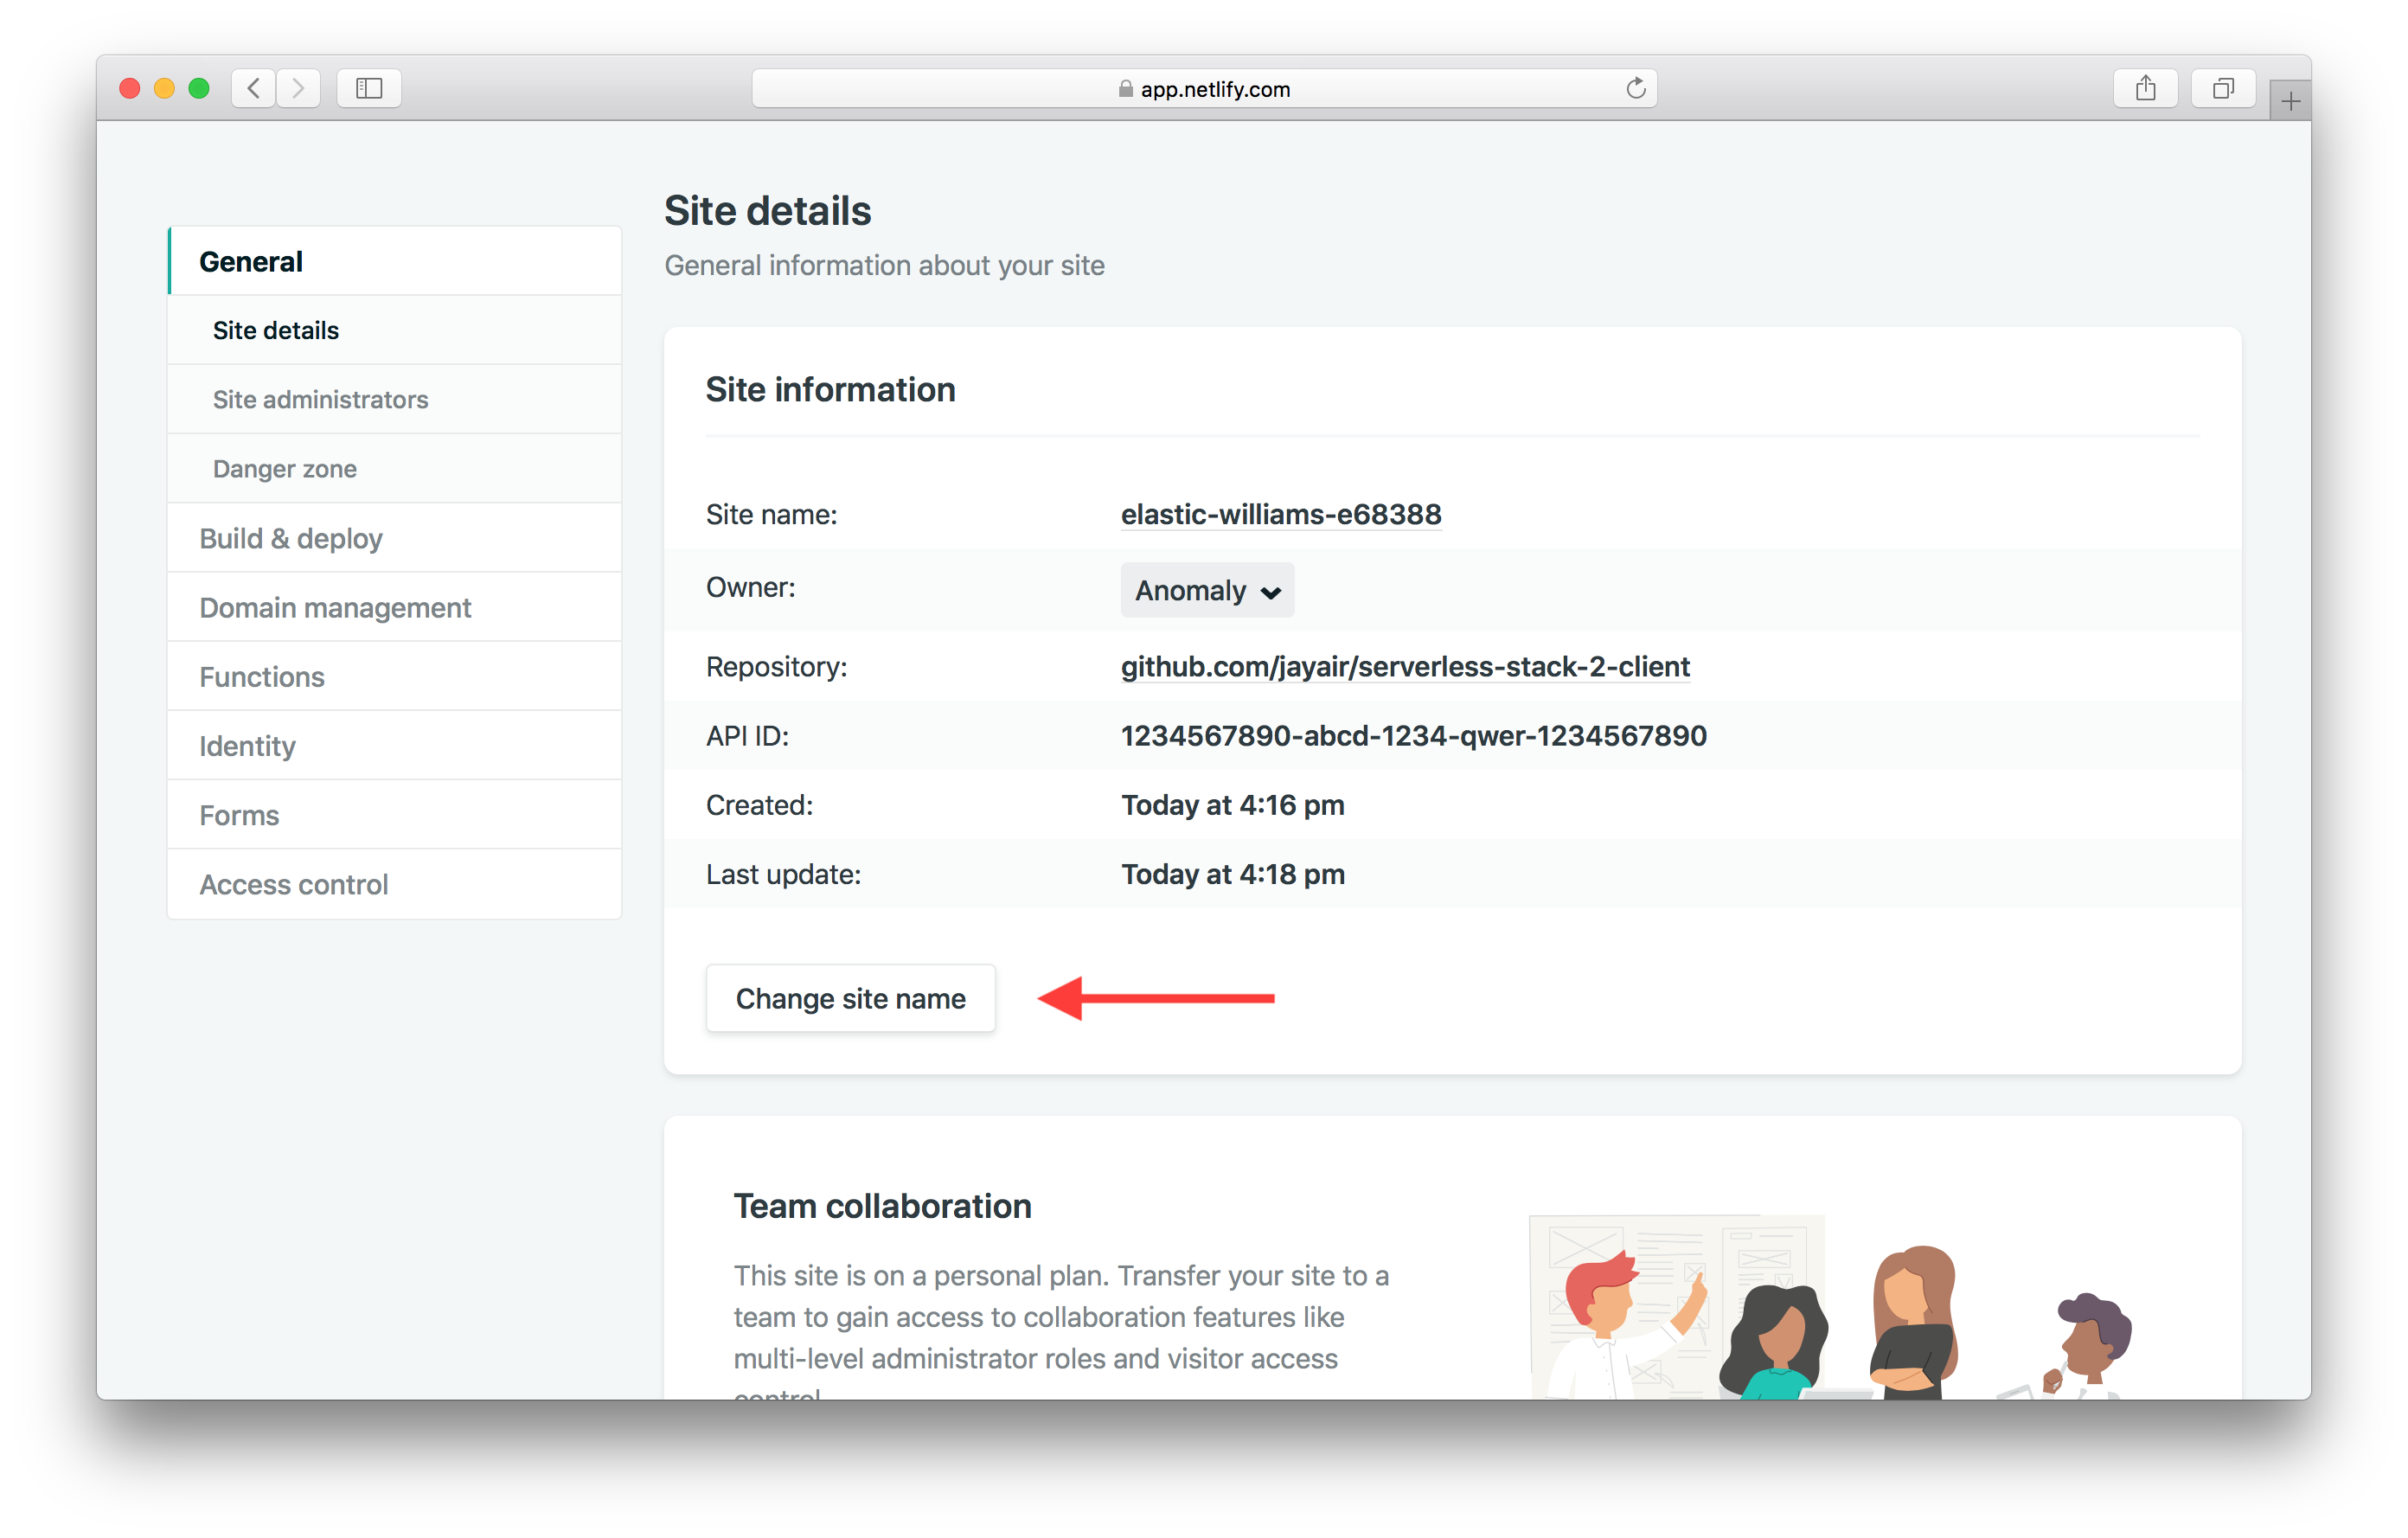
The site names are global, so pick a unique one. In our case we are using serverless-stack-2-client. And hit Save.
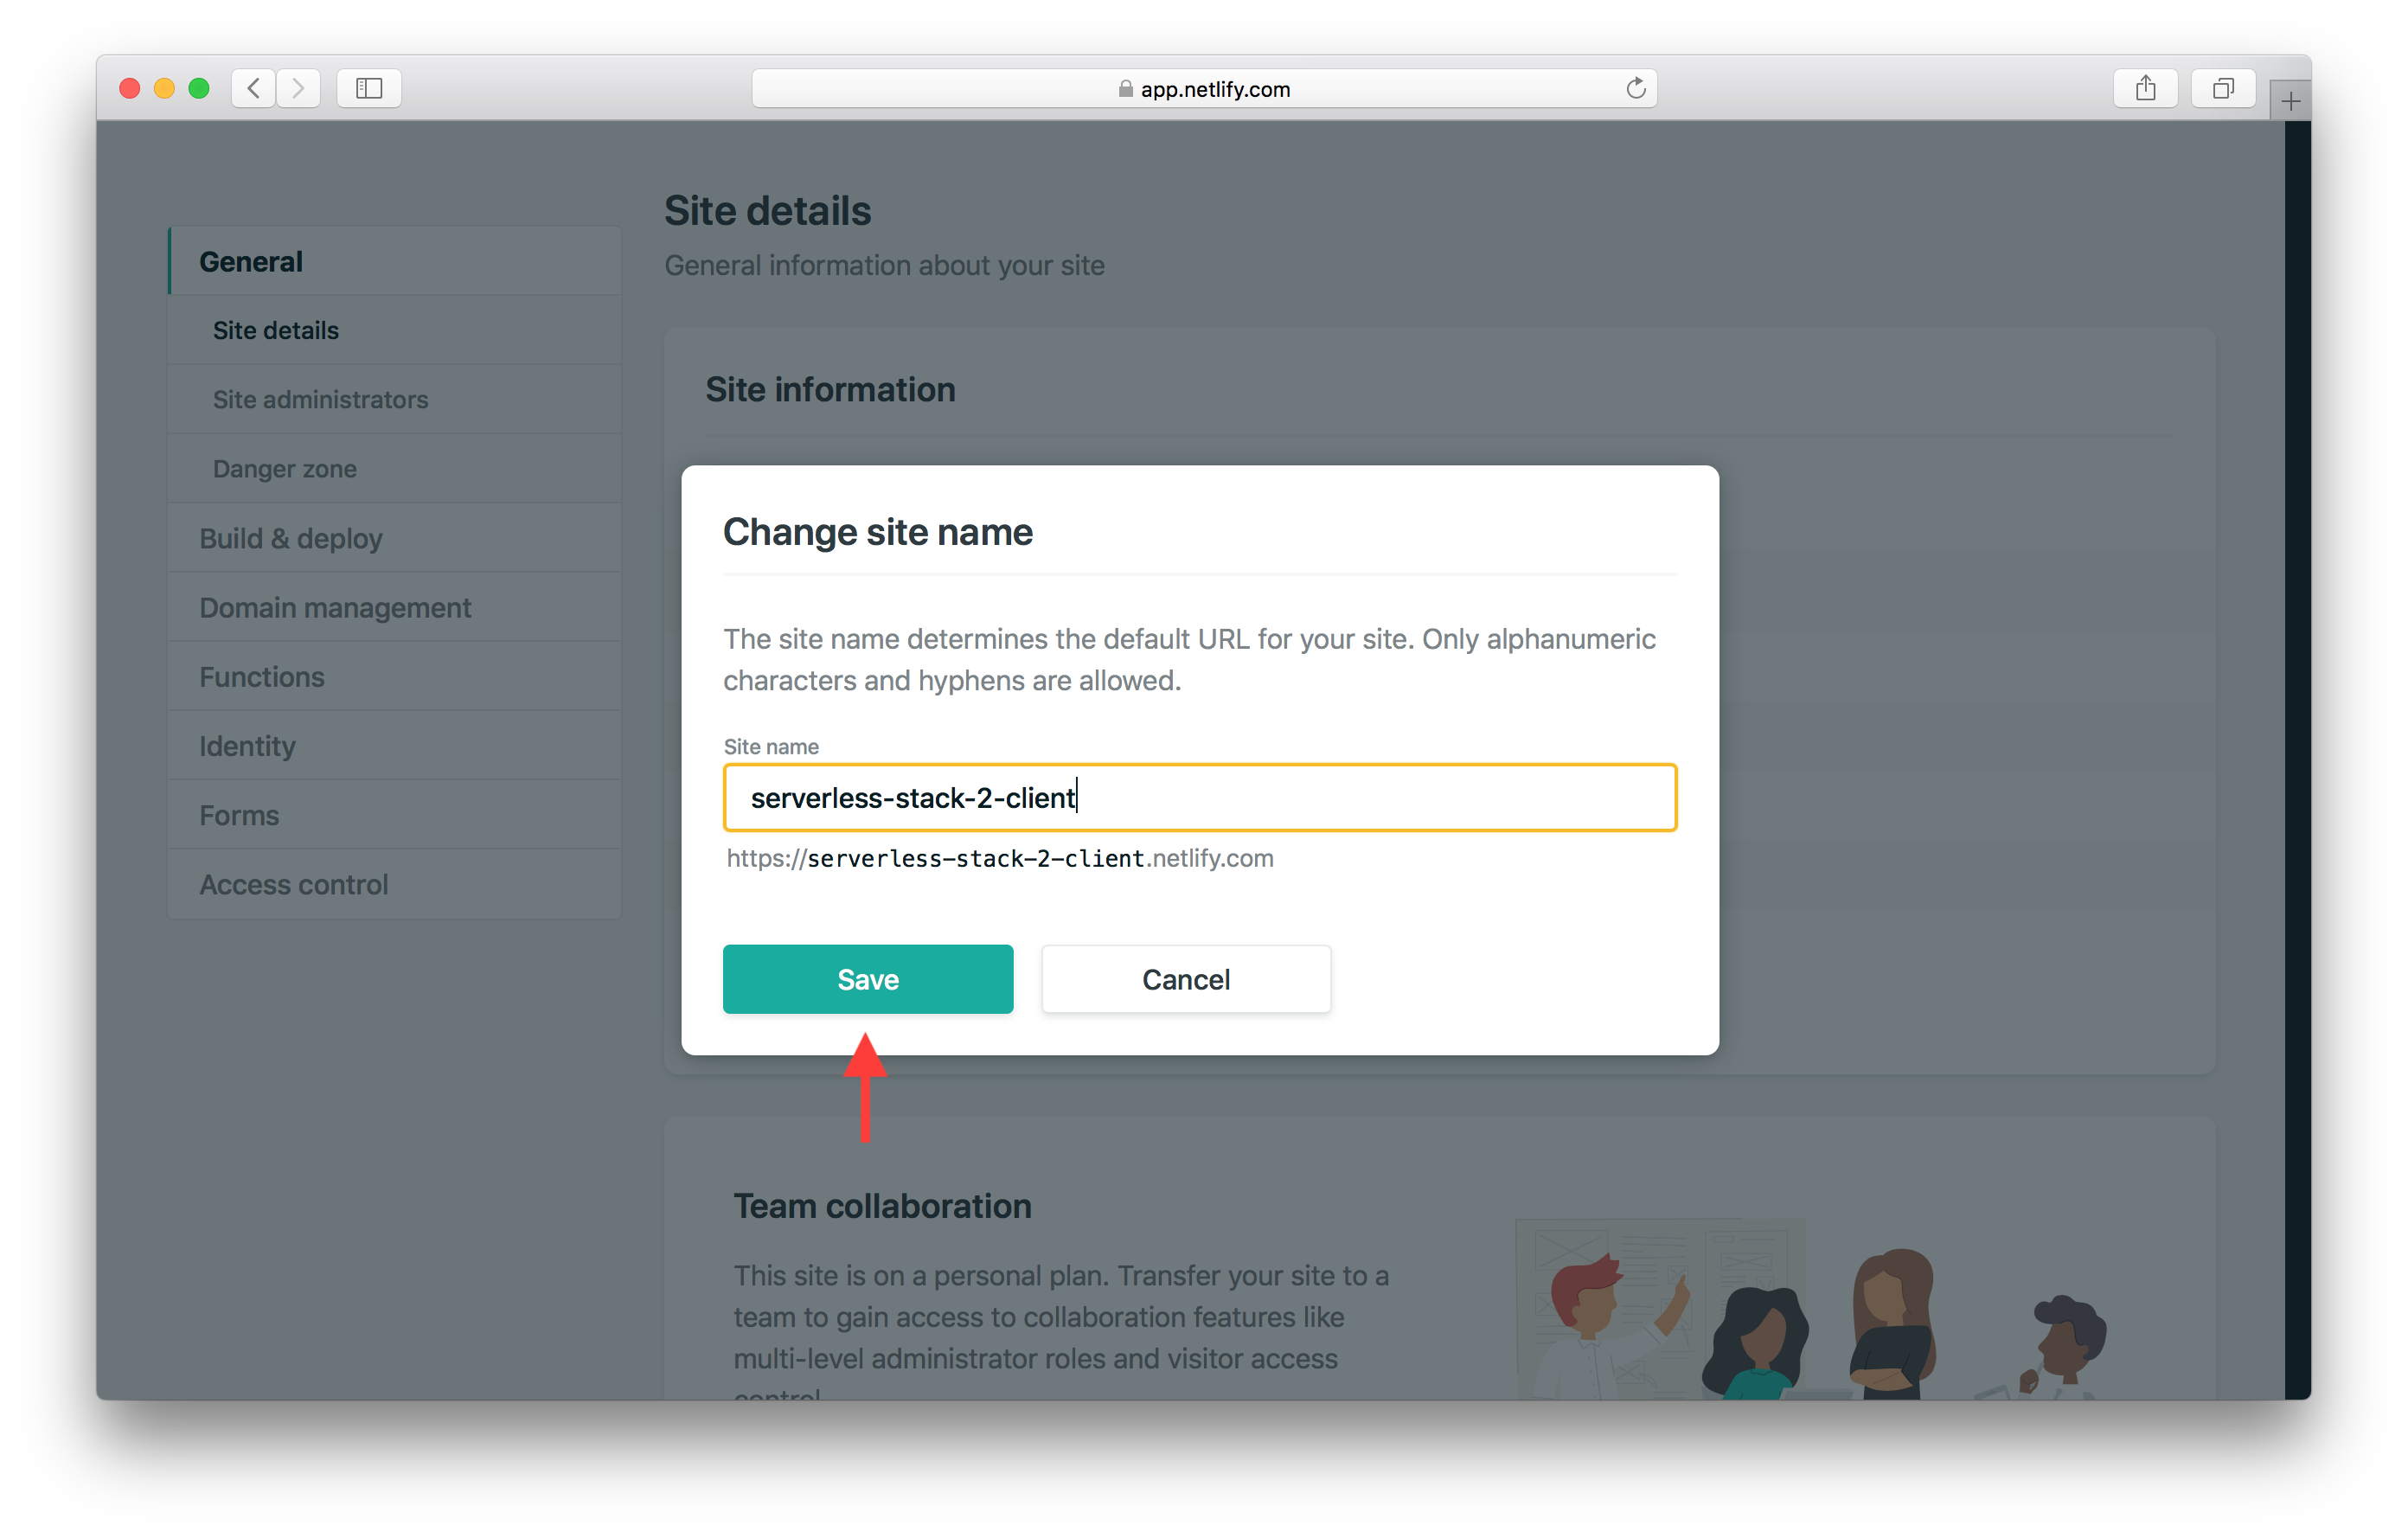
This means that our Netlify site URL is now going to be https://serverless-stack-2-client.netlify.com. Make a note of this as we will use this later in this chapter.
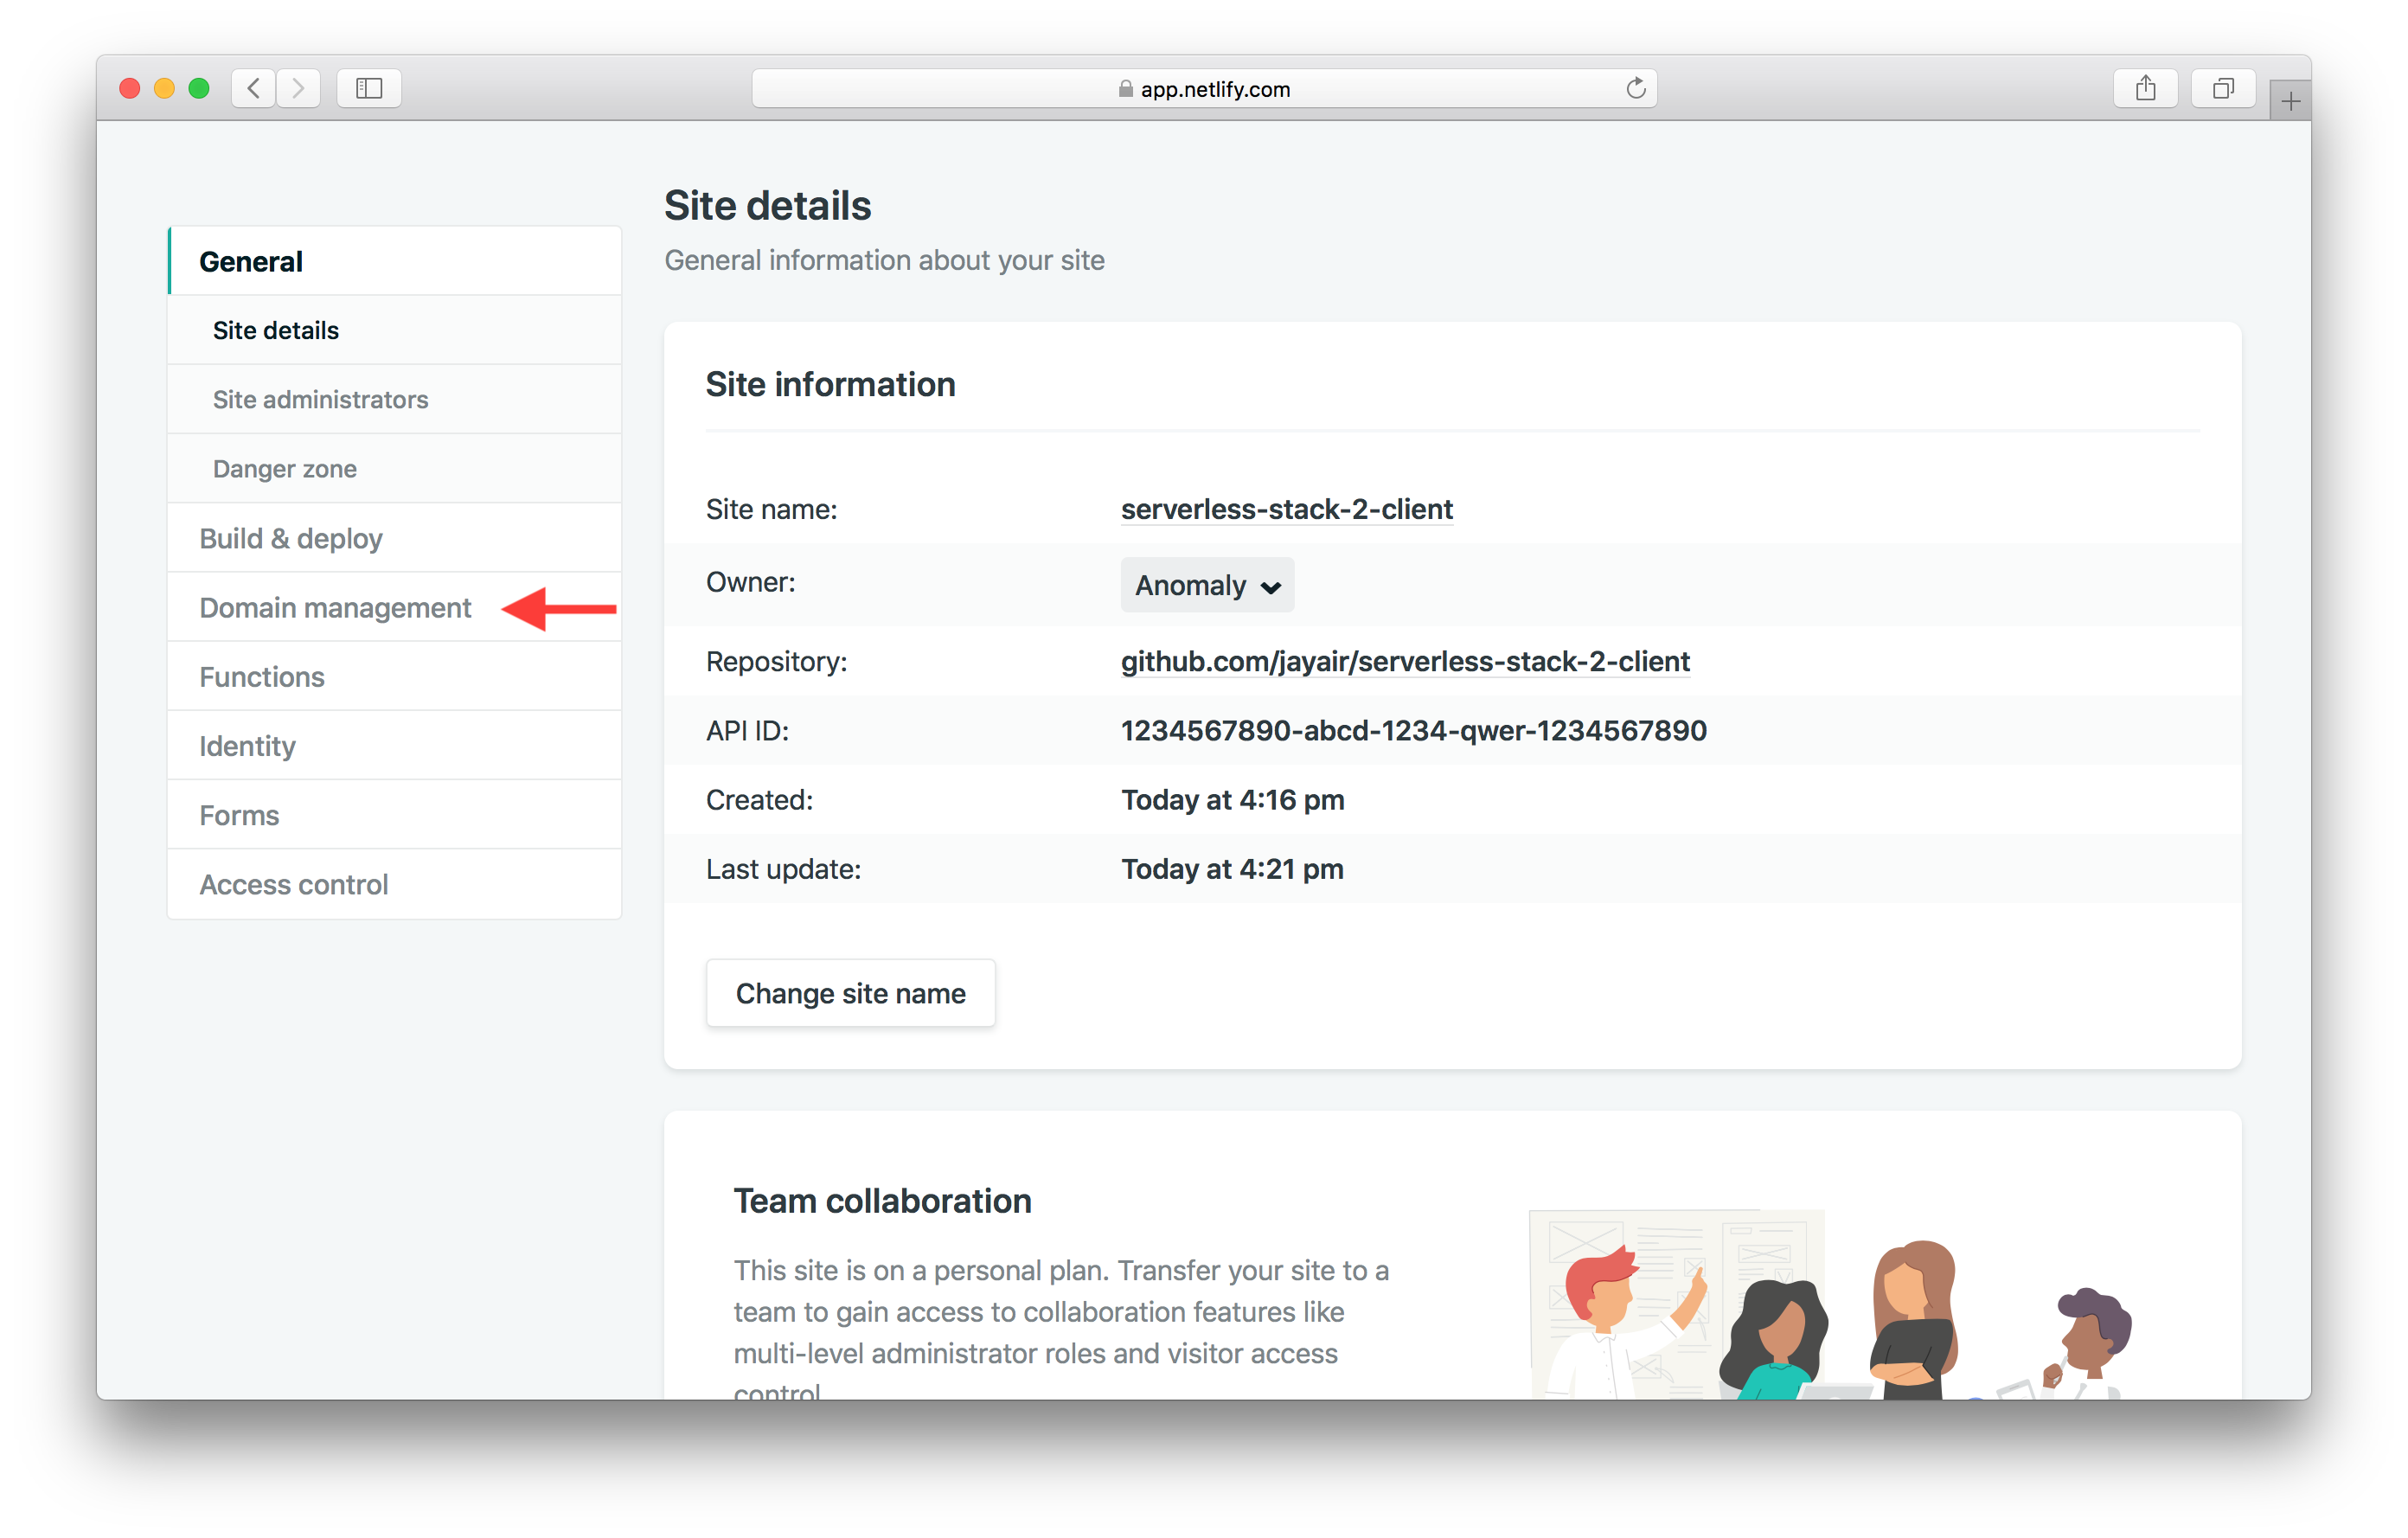
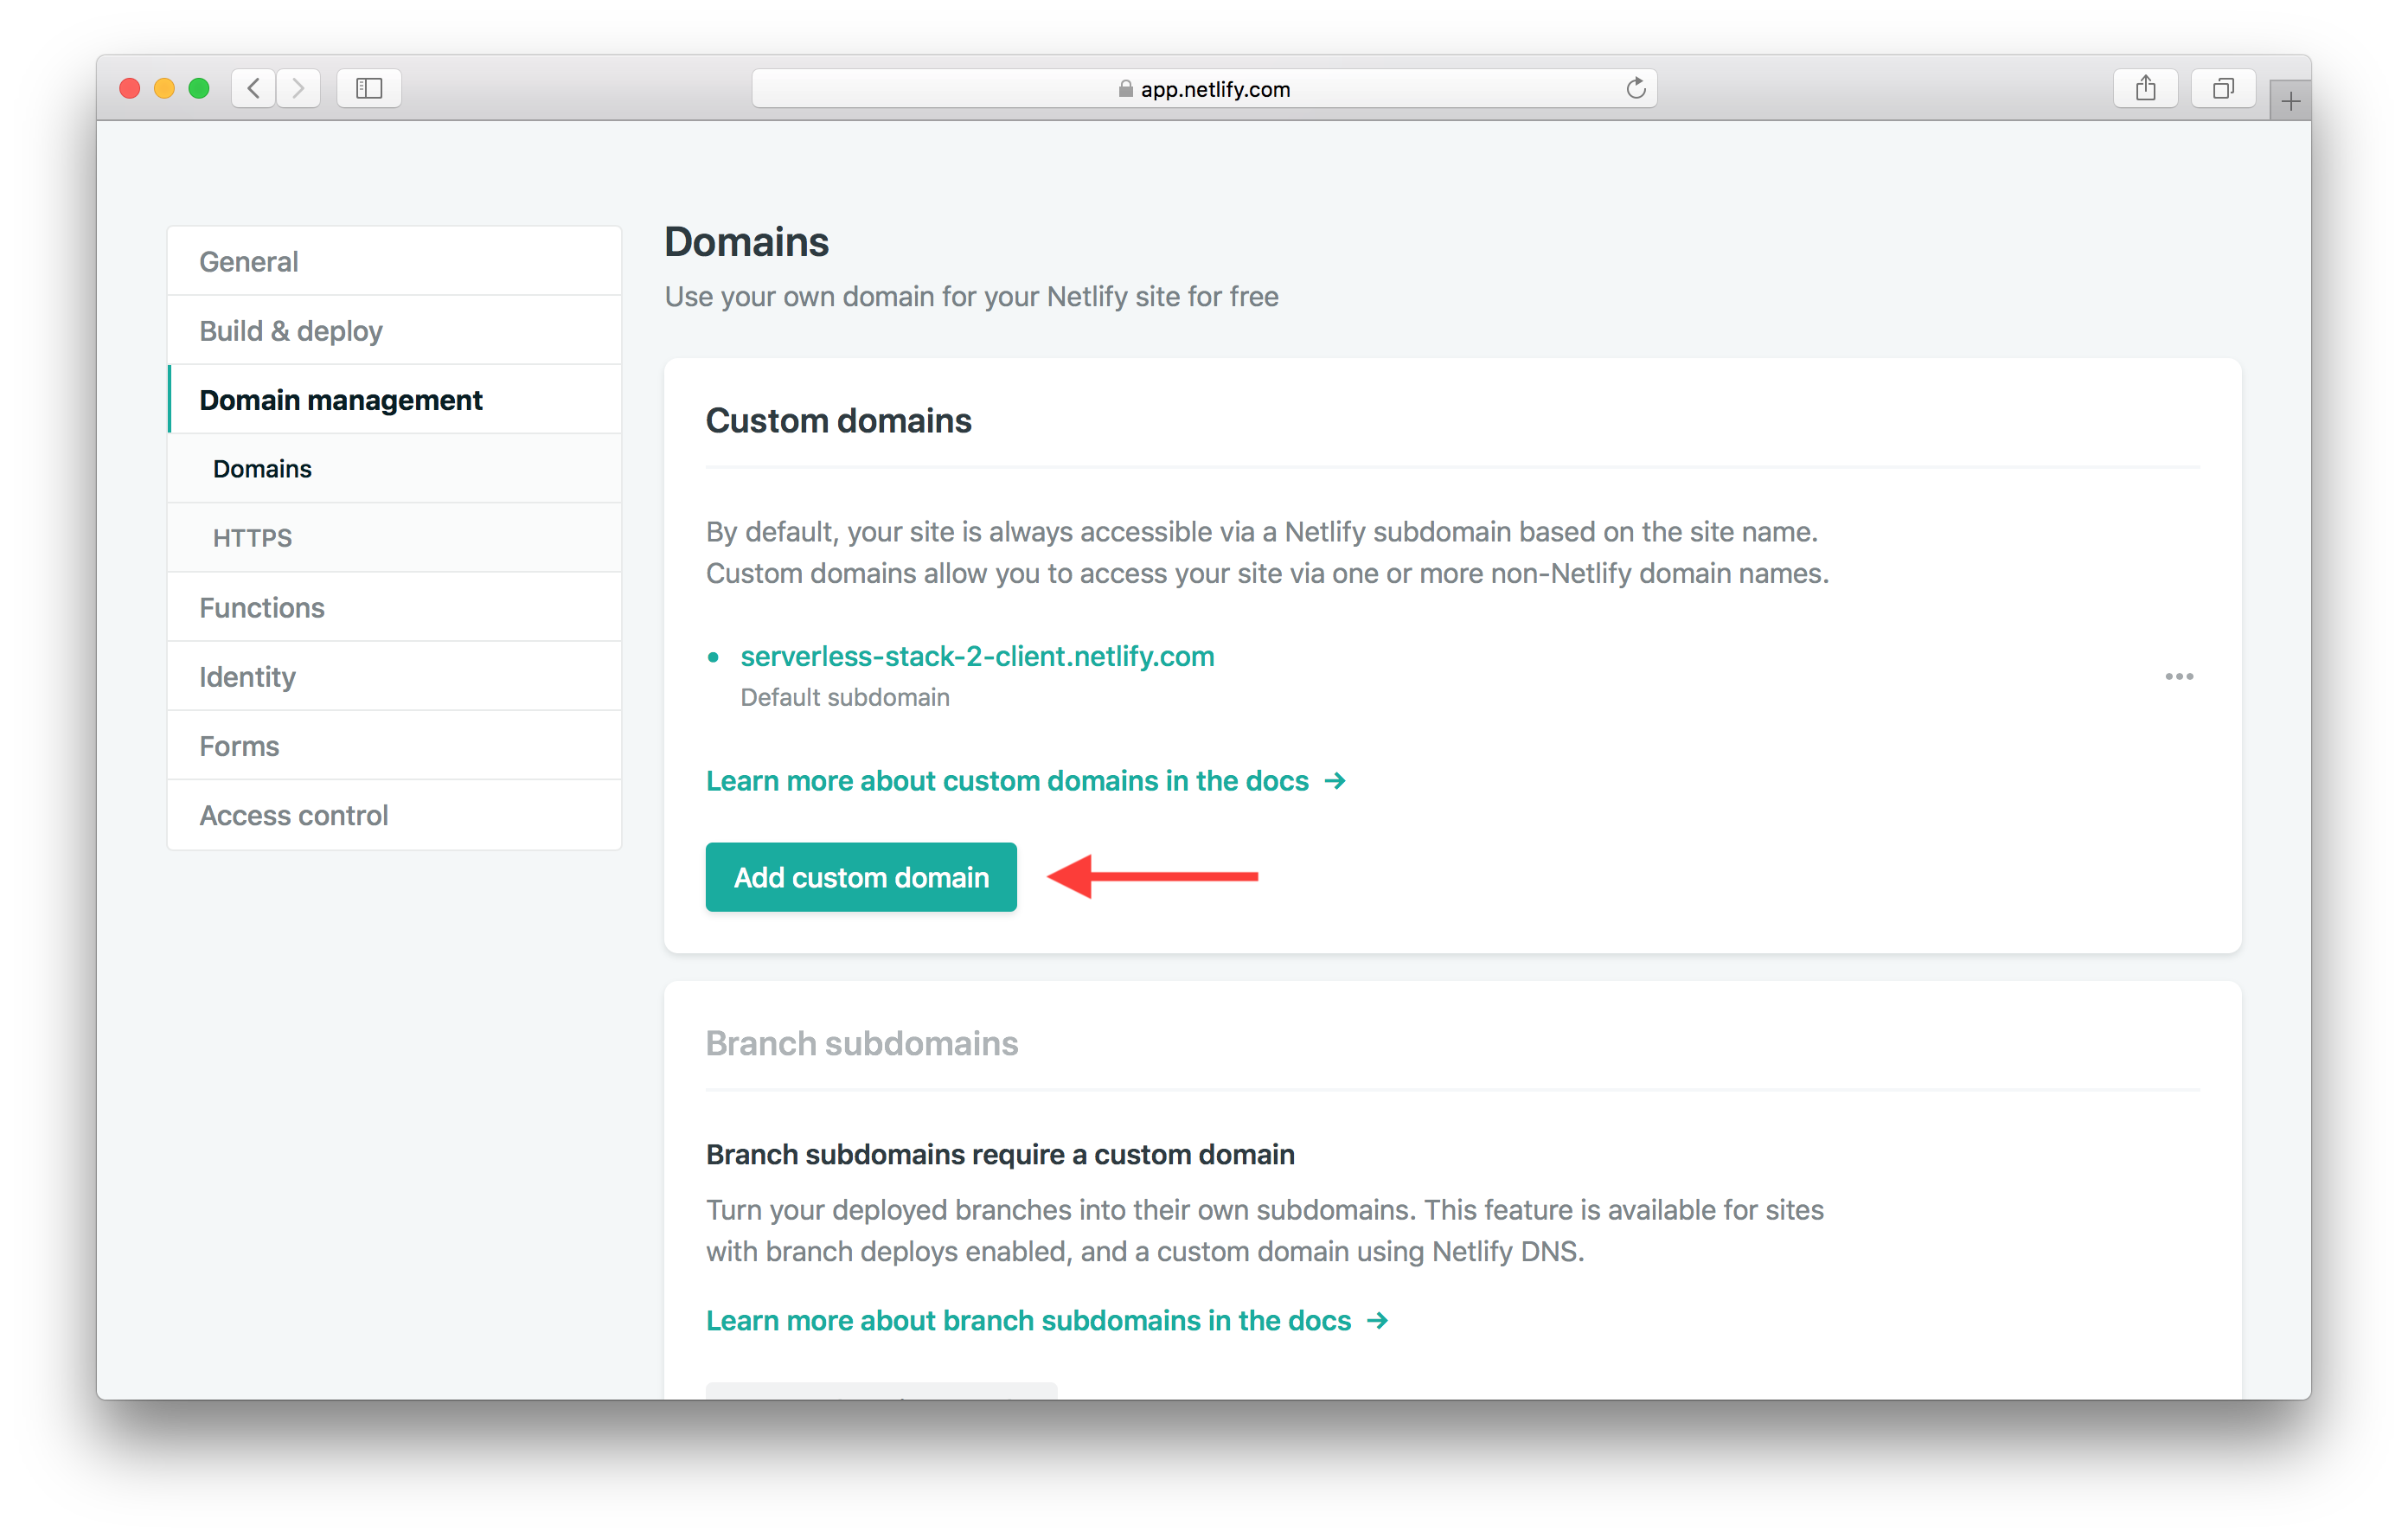
Domain Settings in Netlify
Next hit Domain management from the side panel.
And hit Add custom domain.
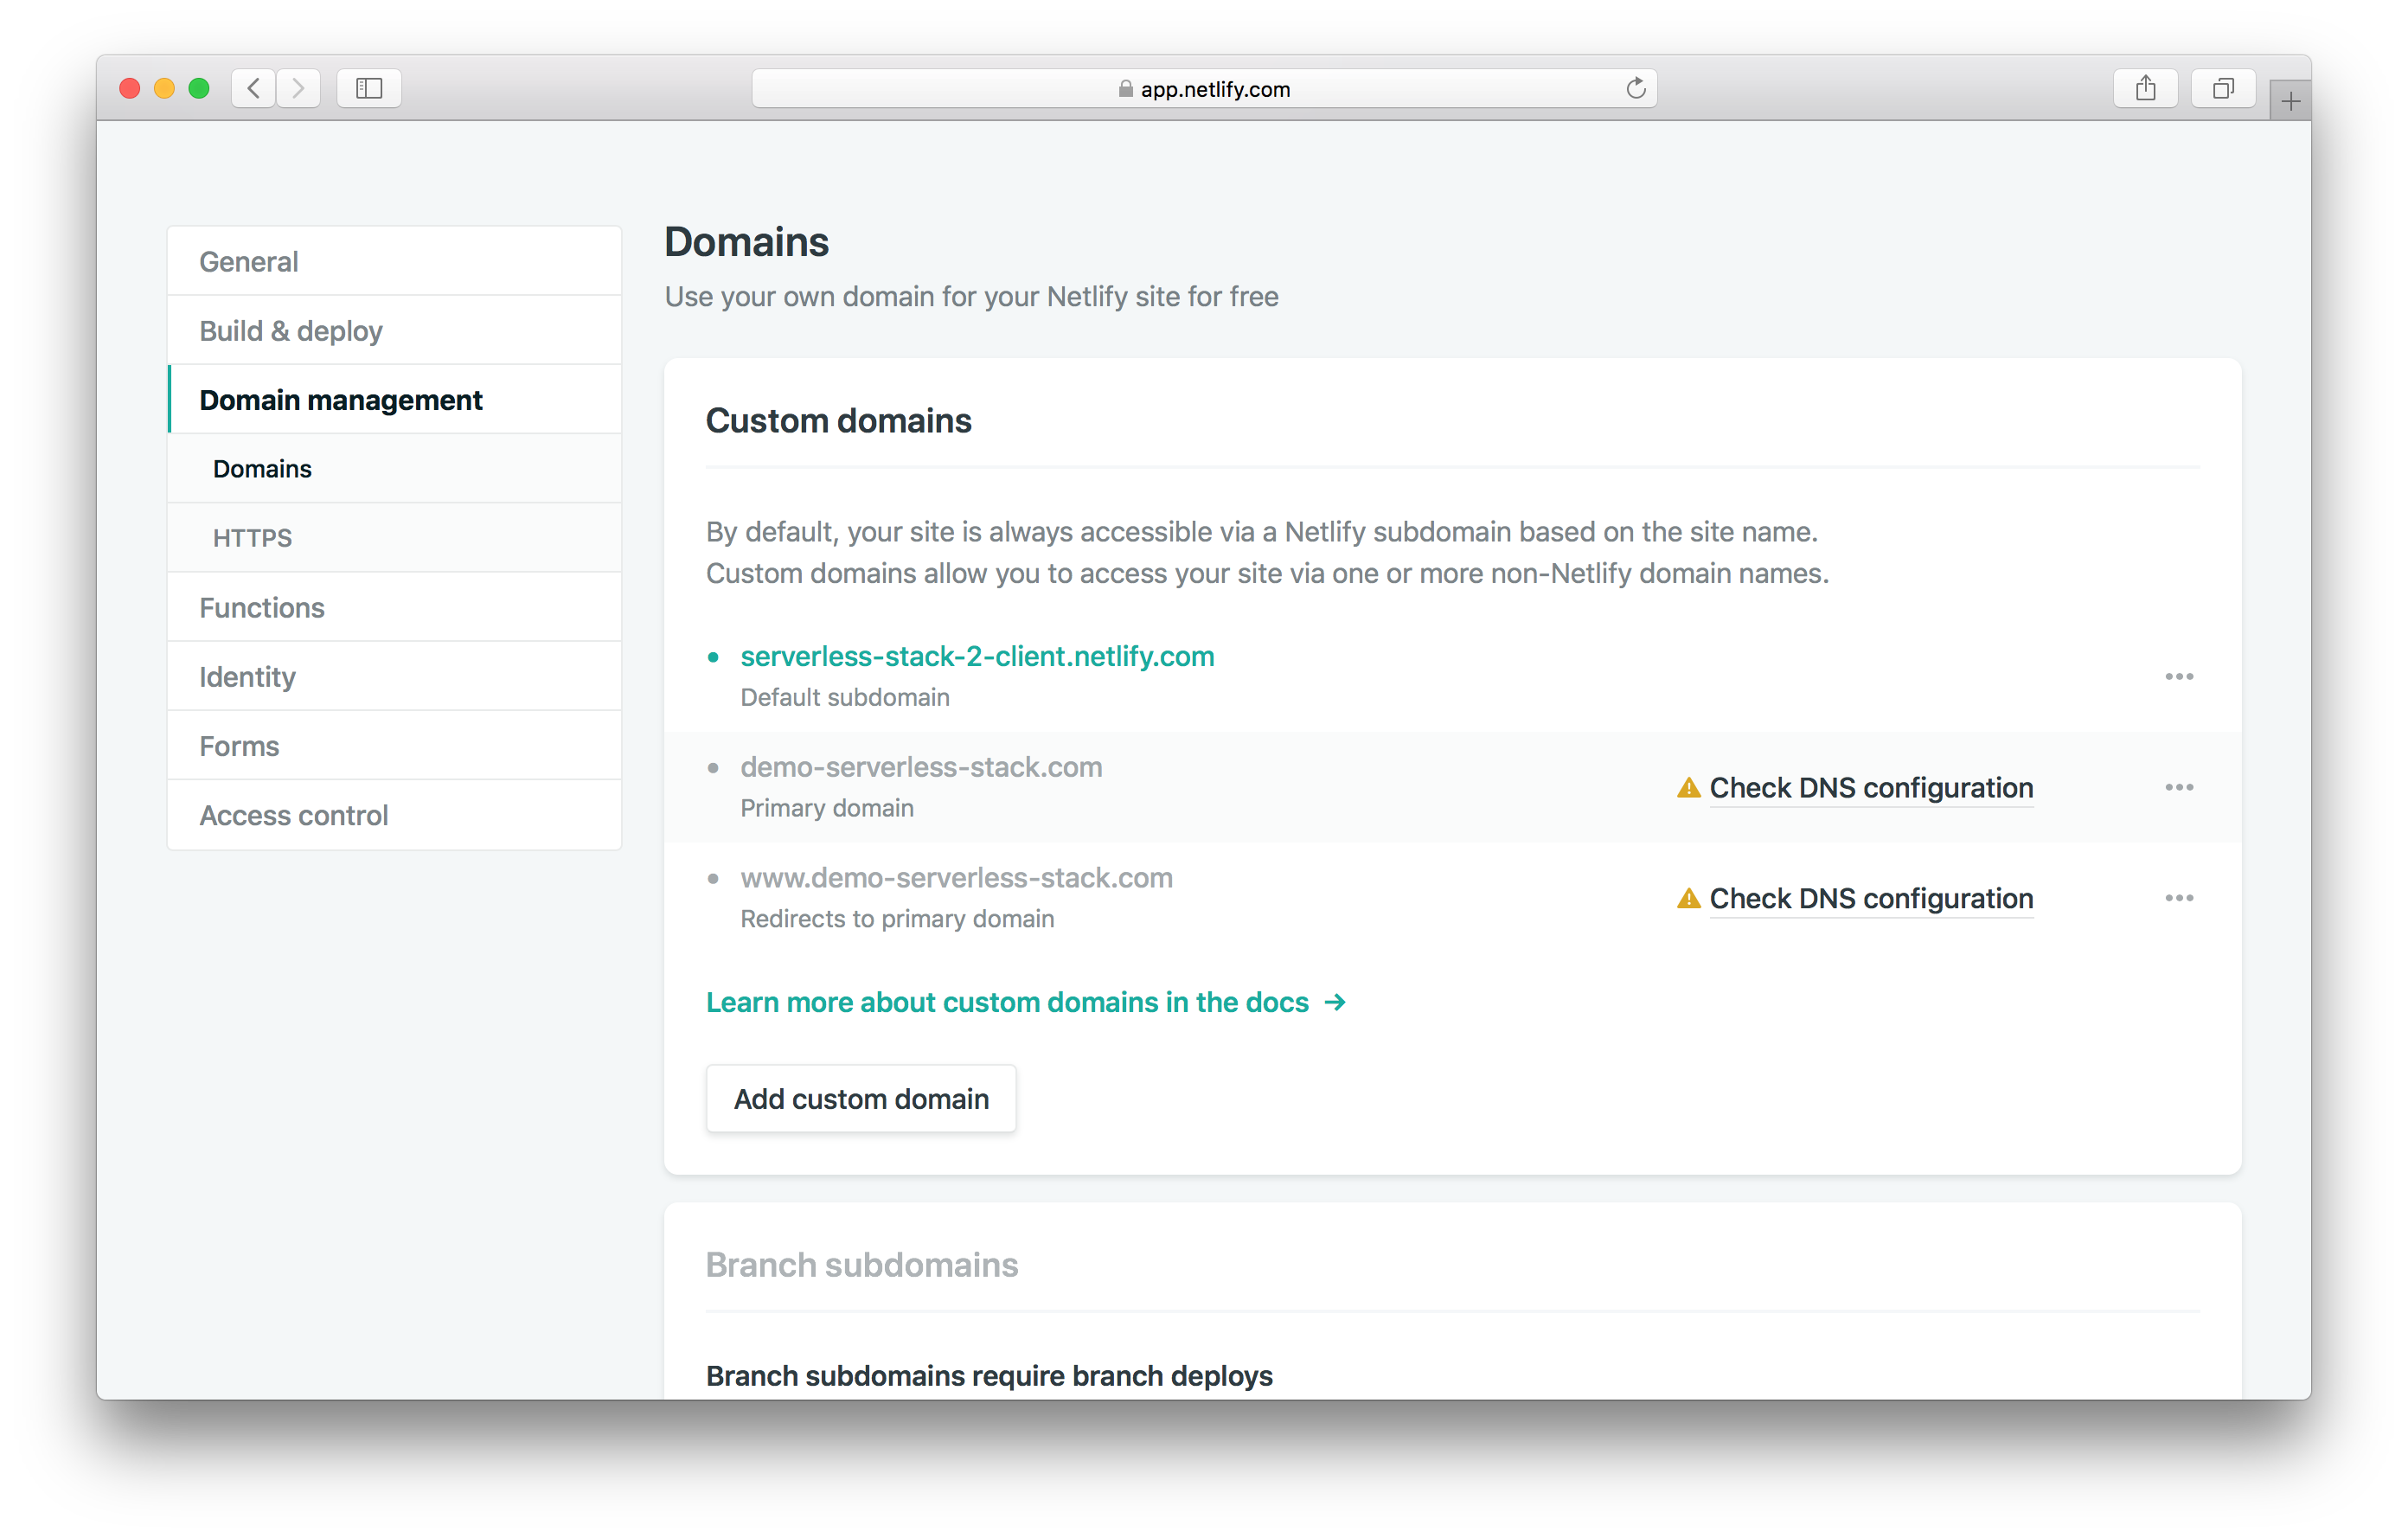
Type in the name of our domain, for example it might be demo-serverless-stack.com. And hit Save.
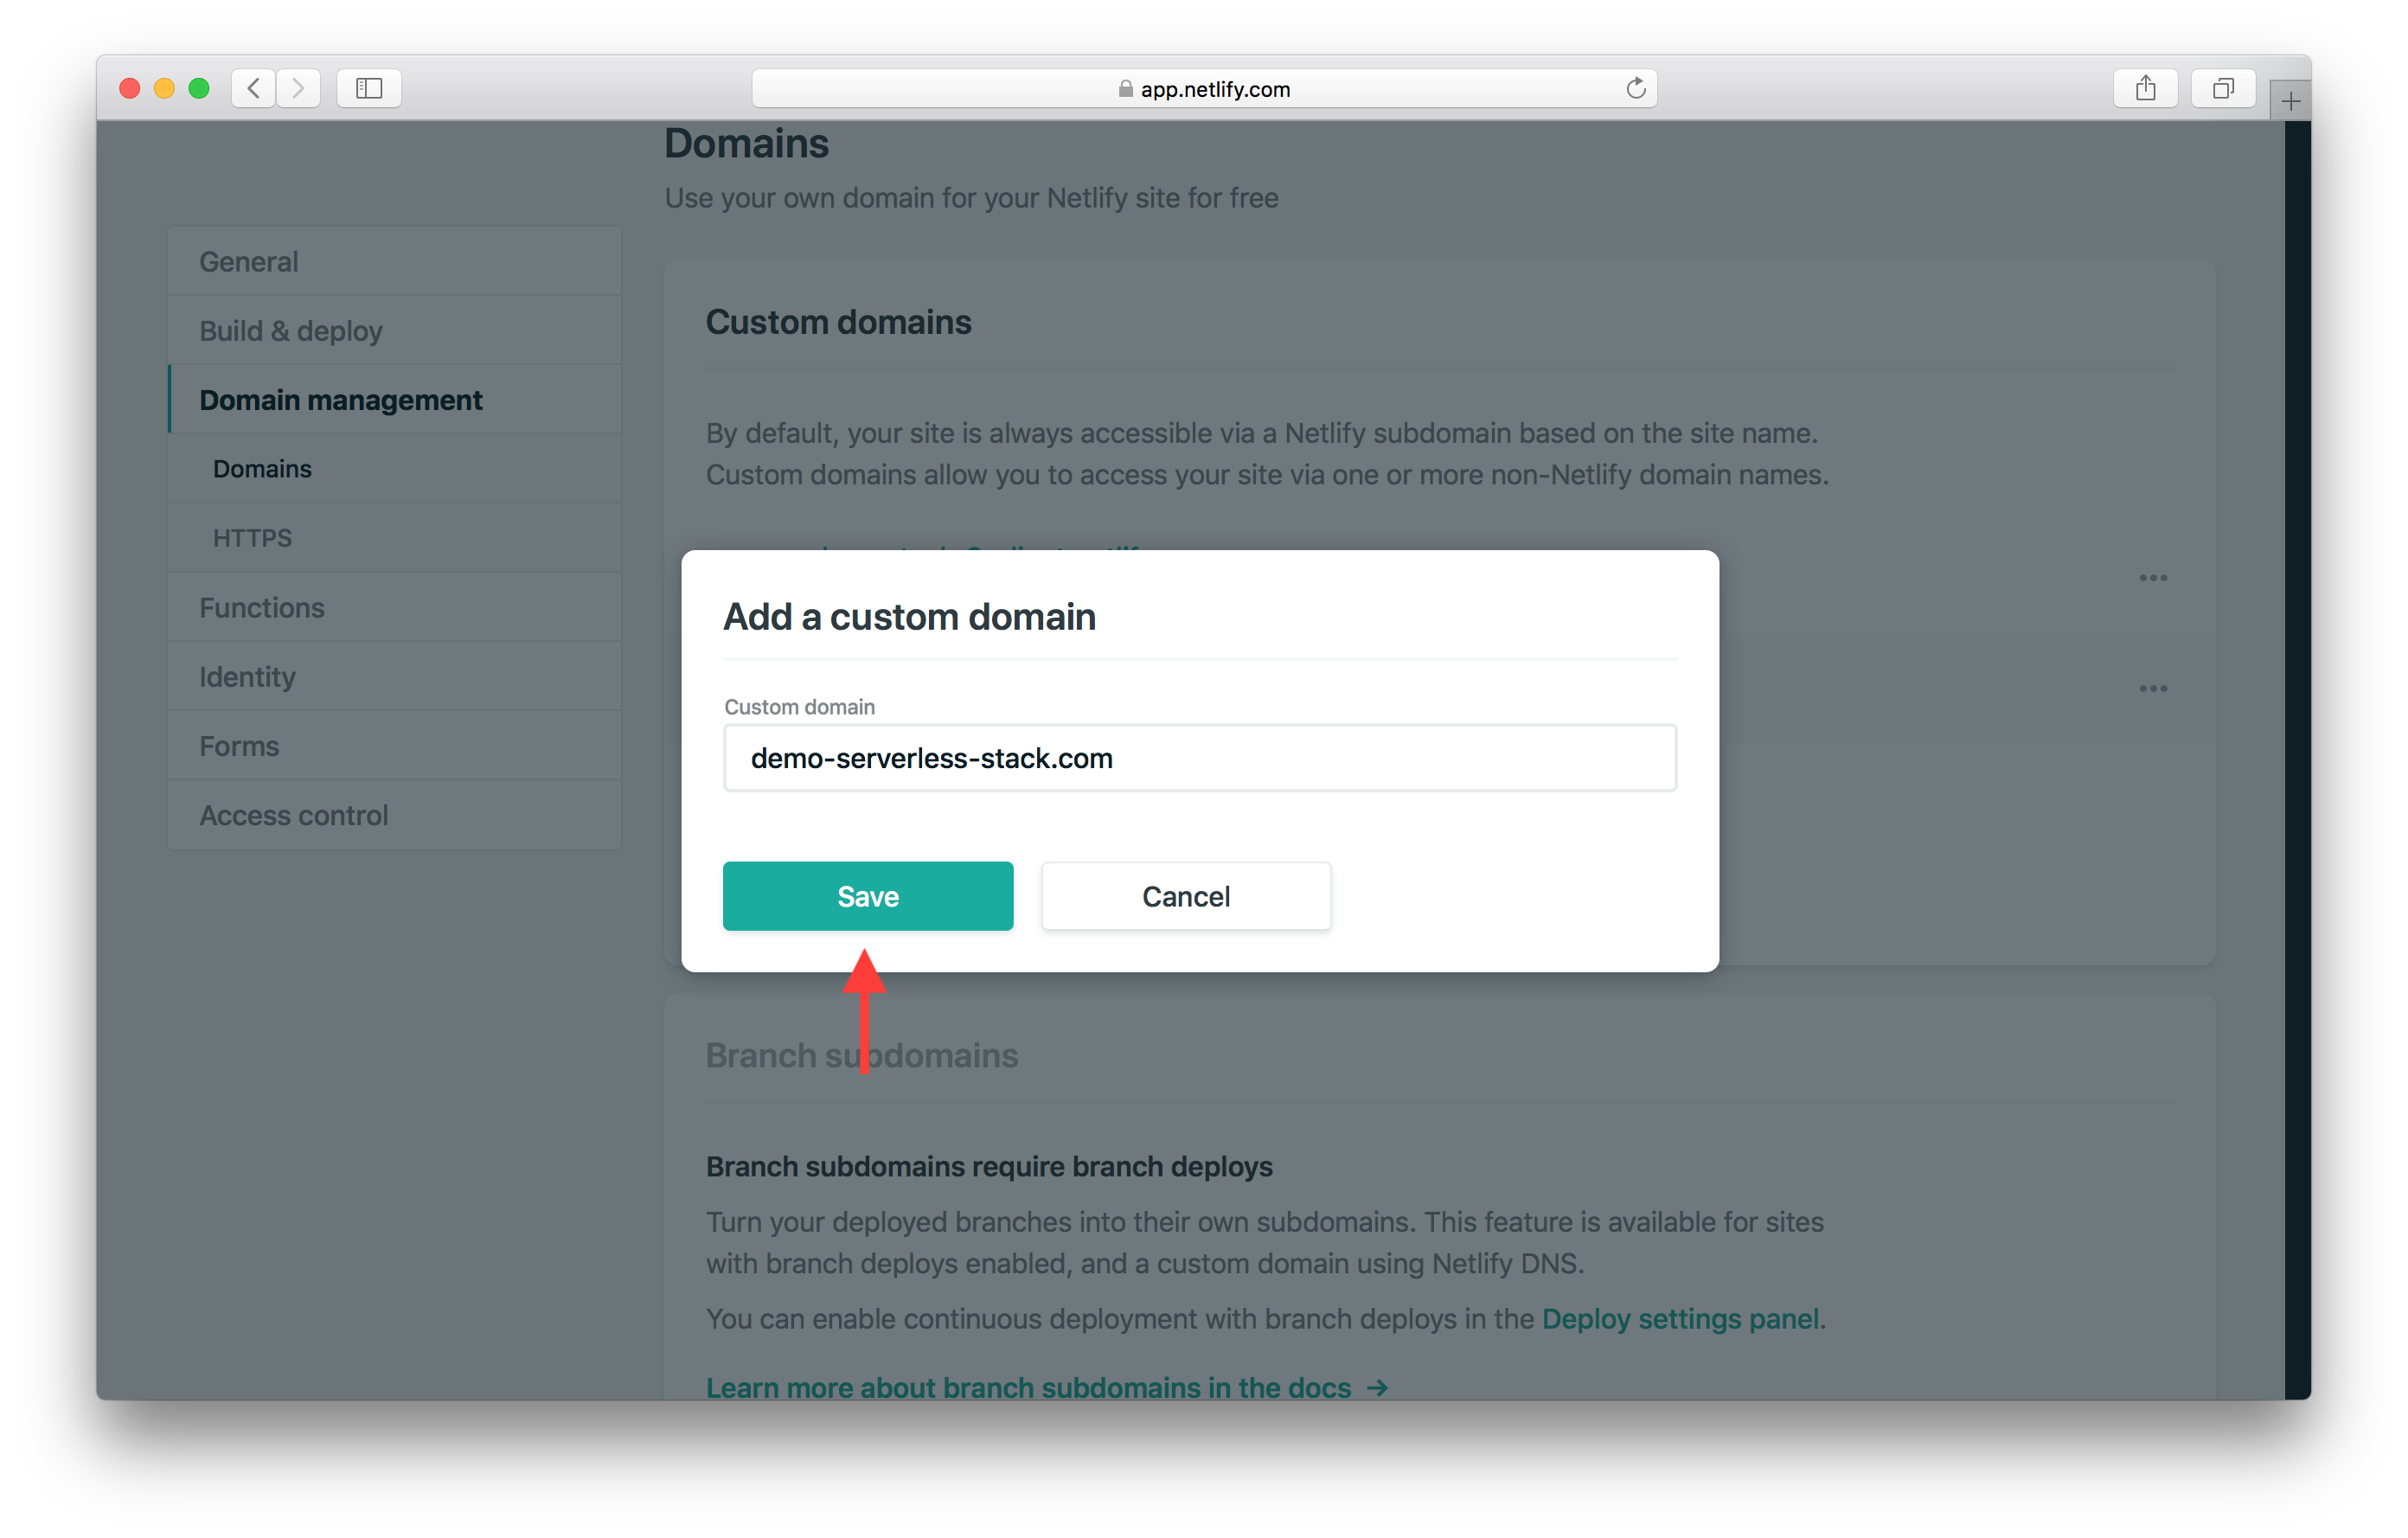
This will automatically add the www version as well and will ask you to configure your DNS.
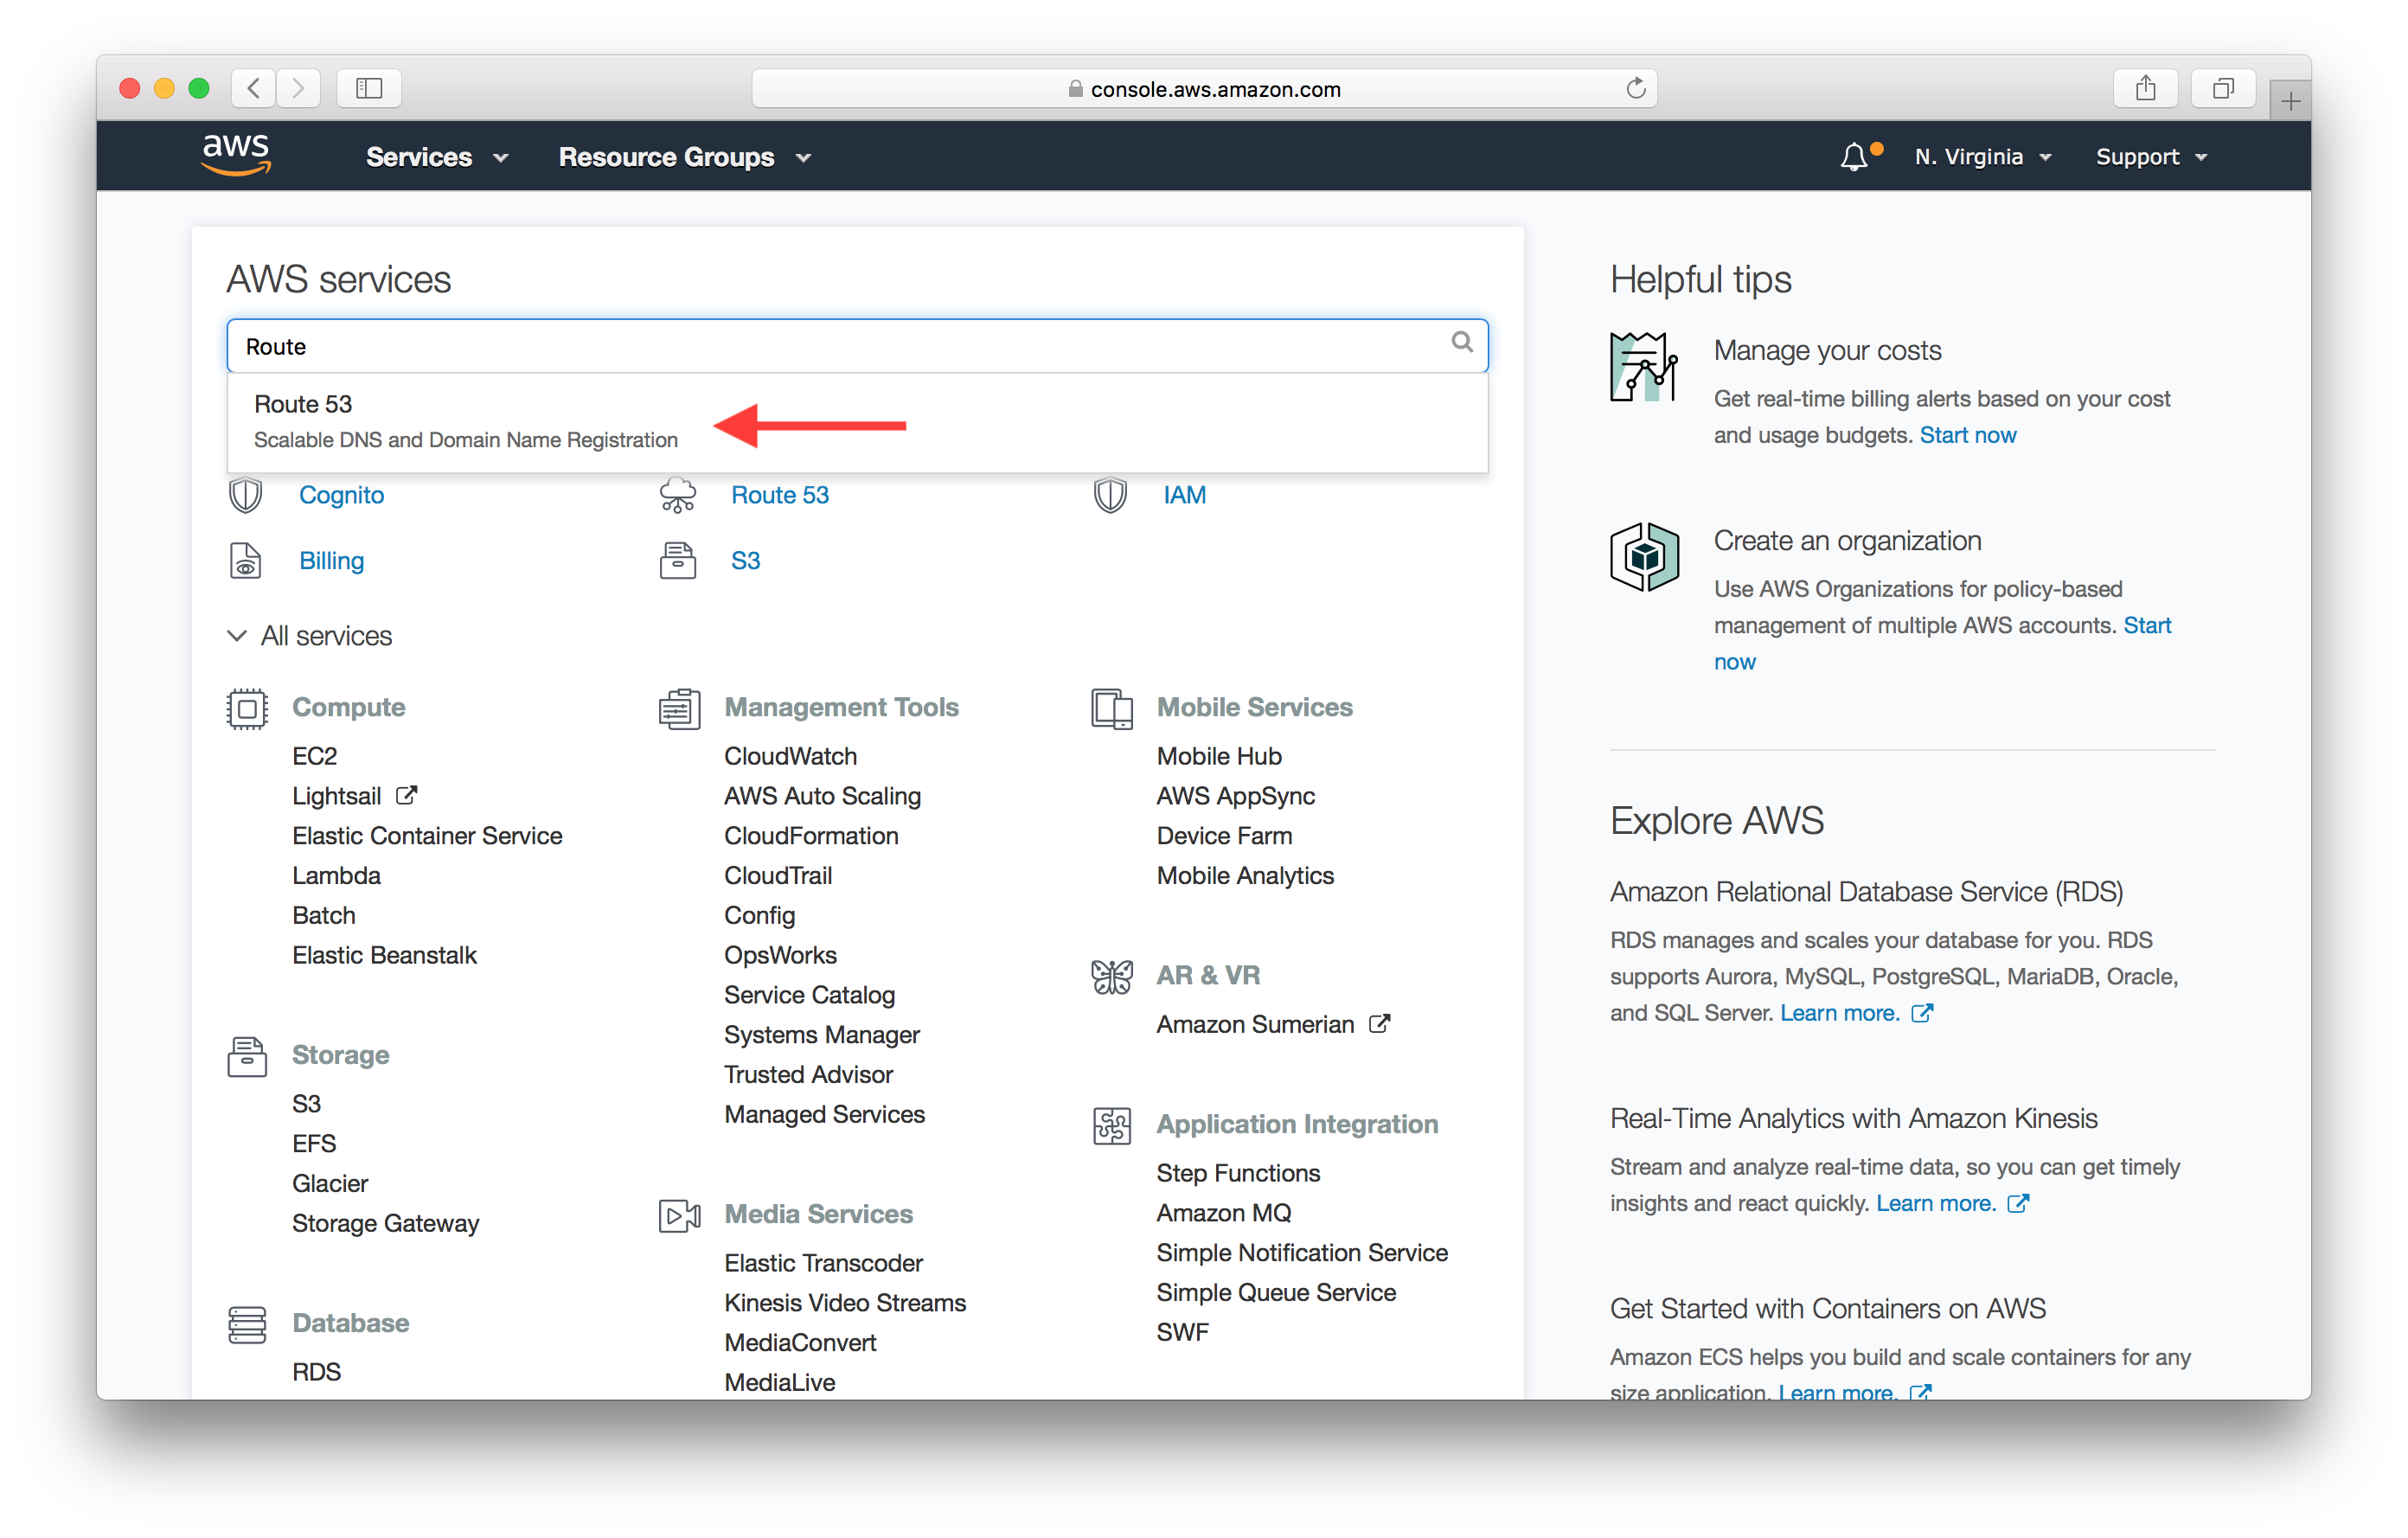
DNS Settings in Route 53
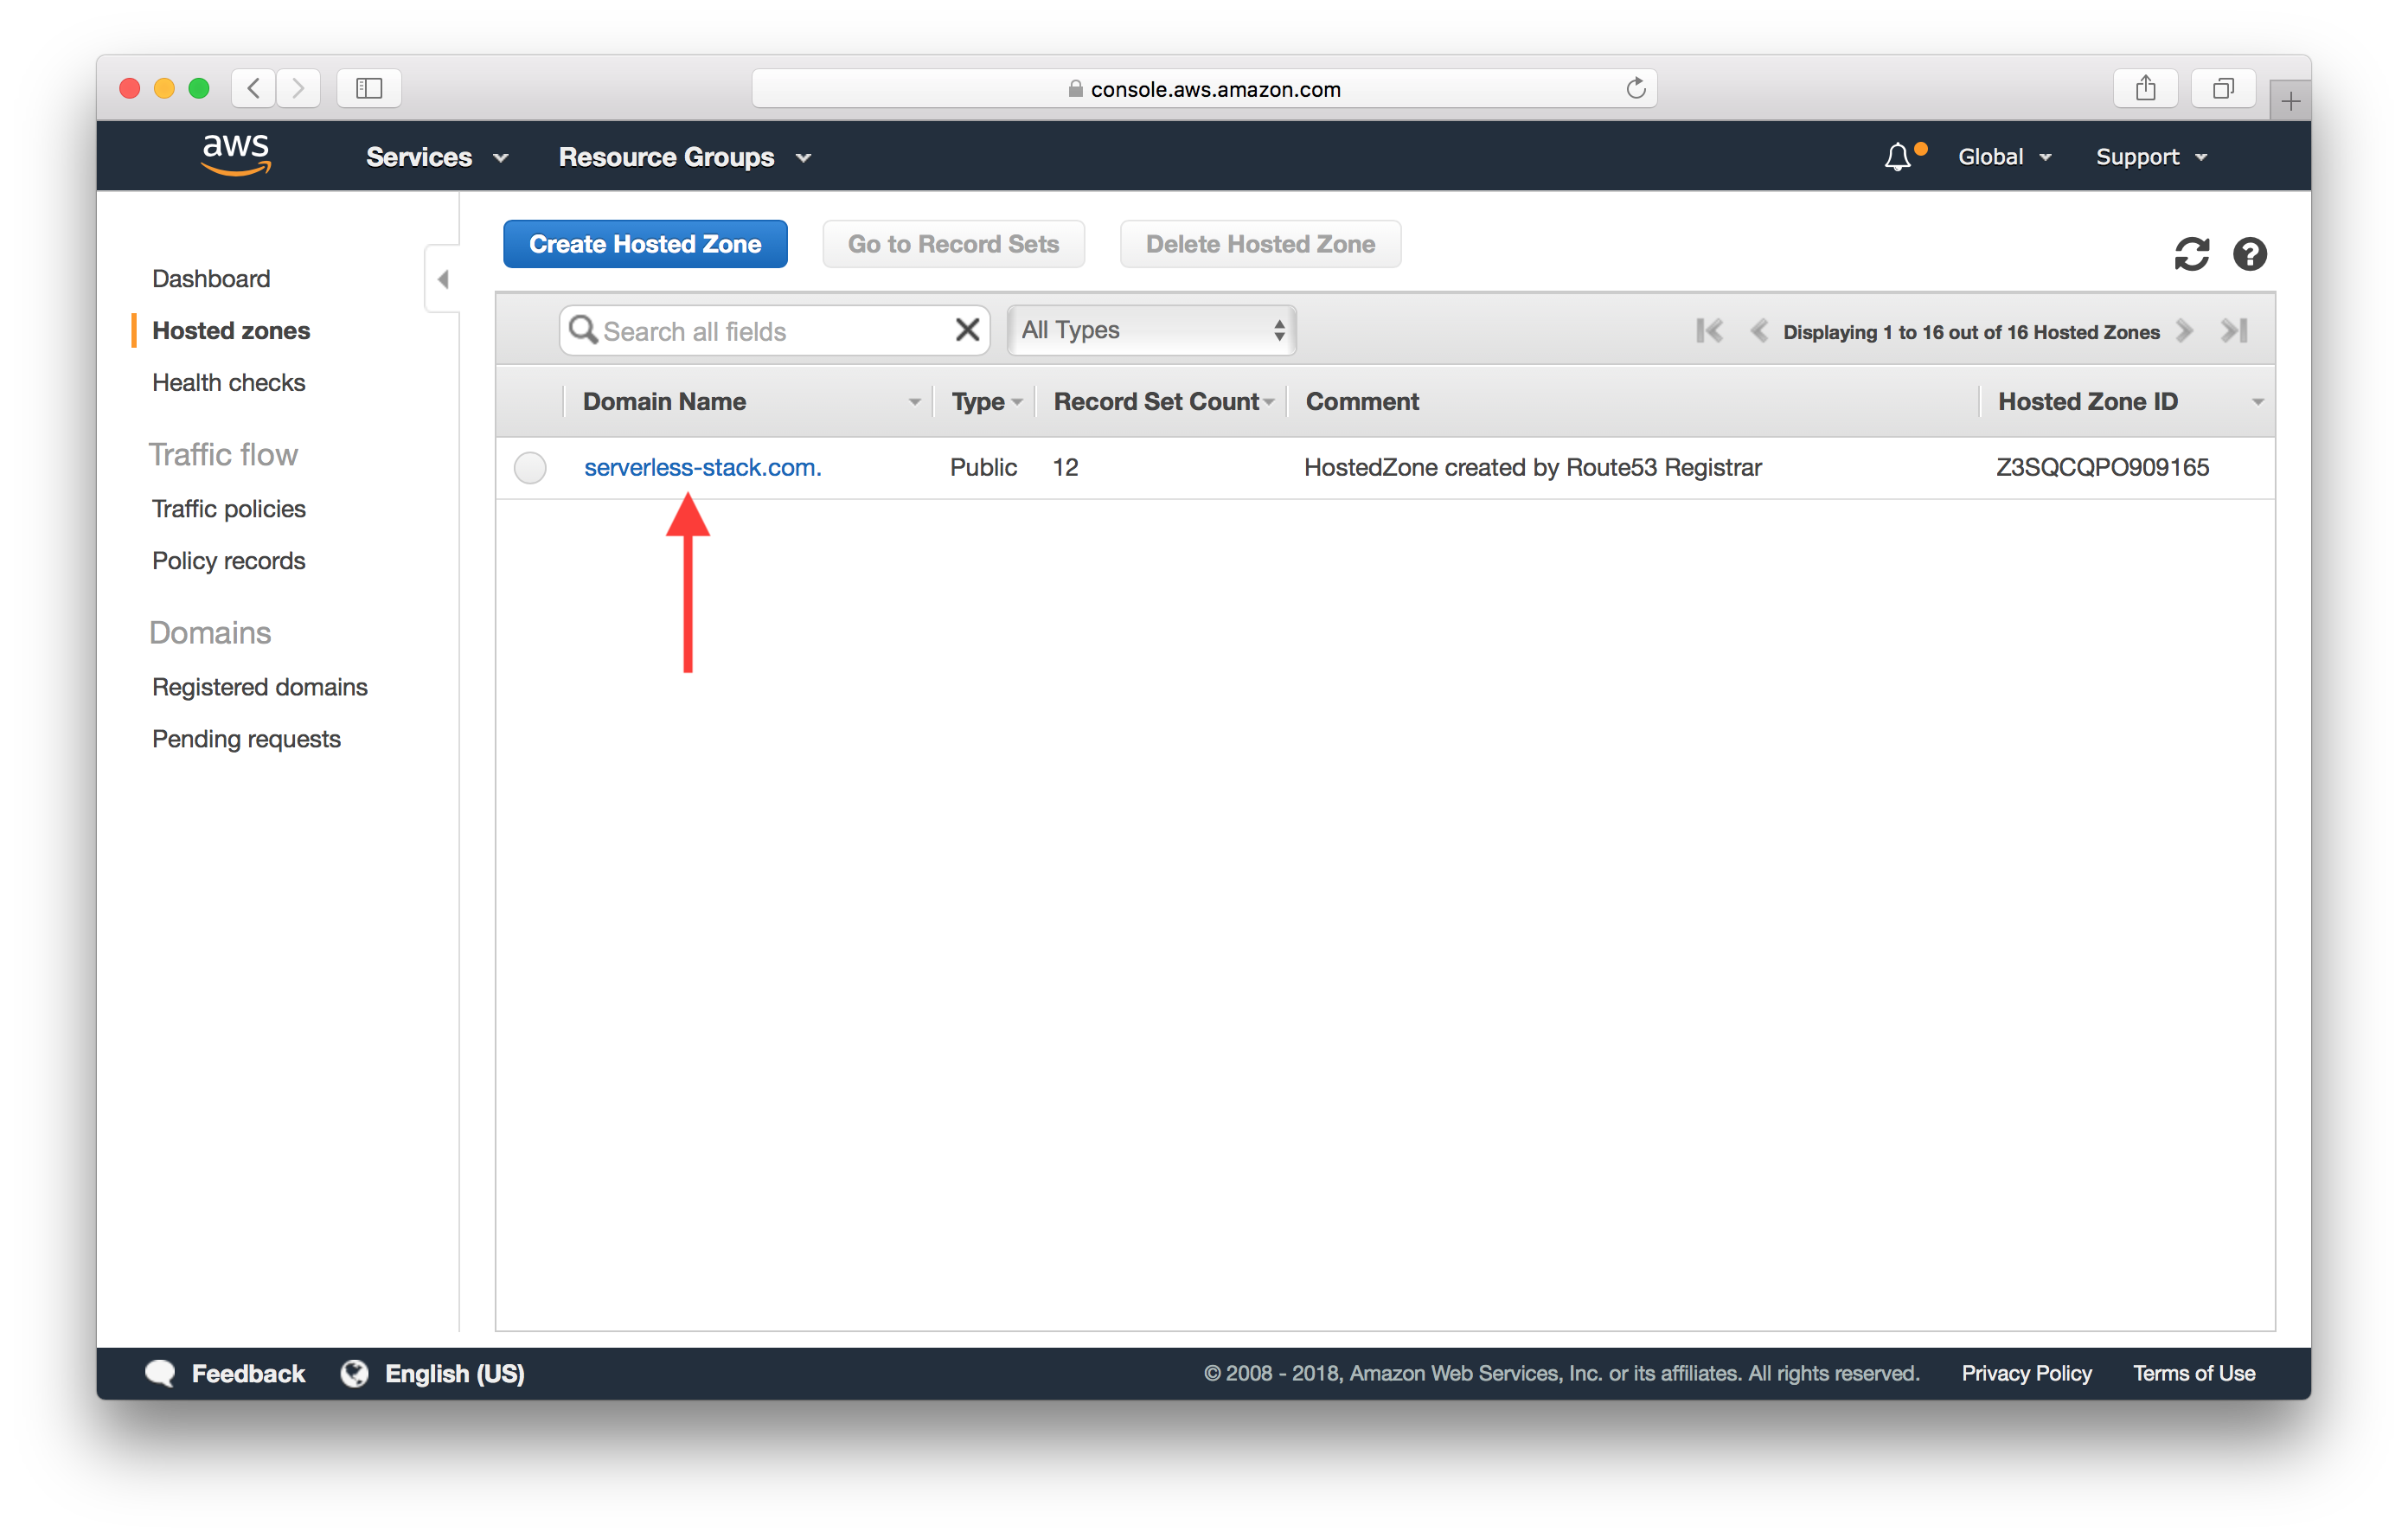
To do this we need to head back to the AWS Console. and search for Route 53 as the service.
Click on Hosted zones.
And select the domain we want to configure.
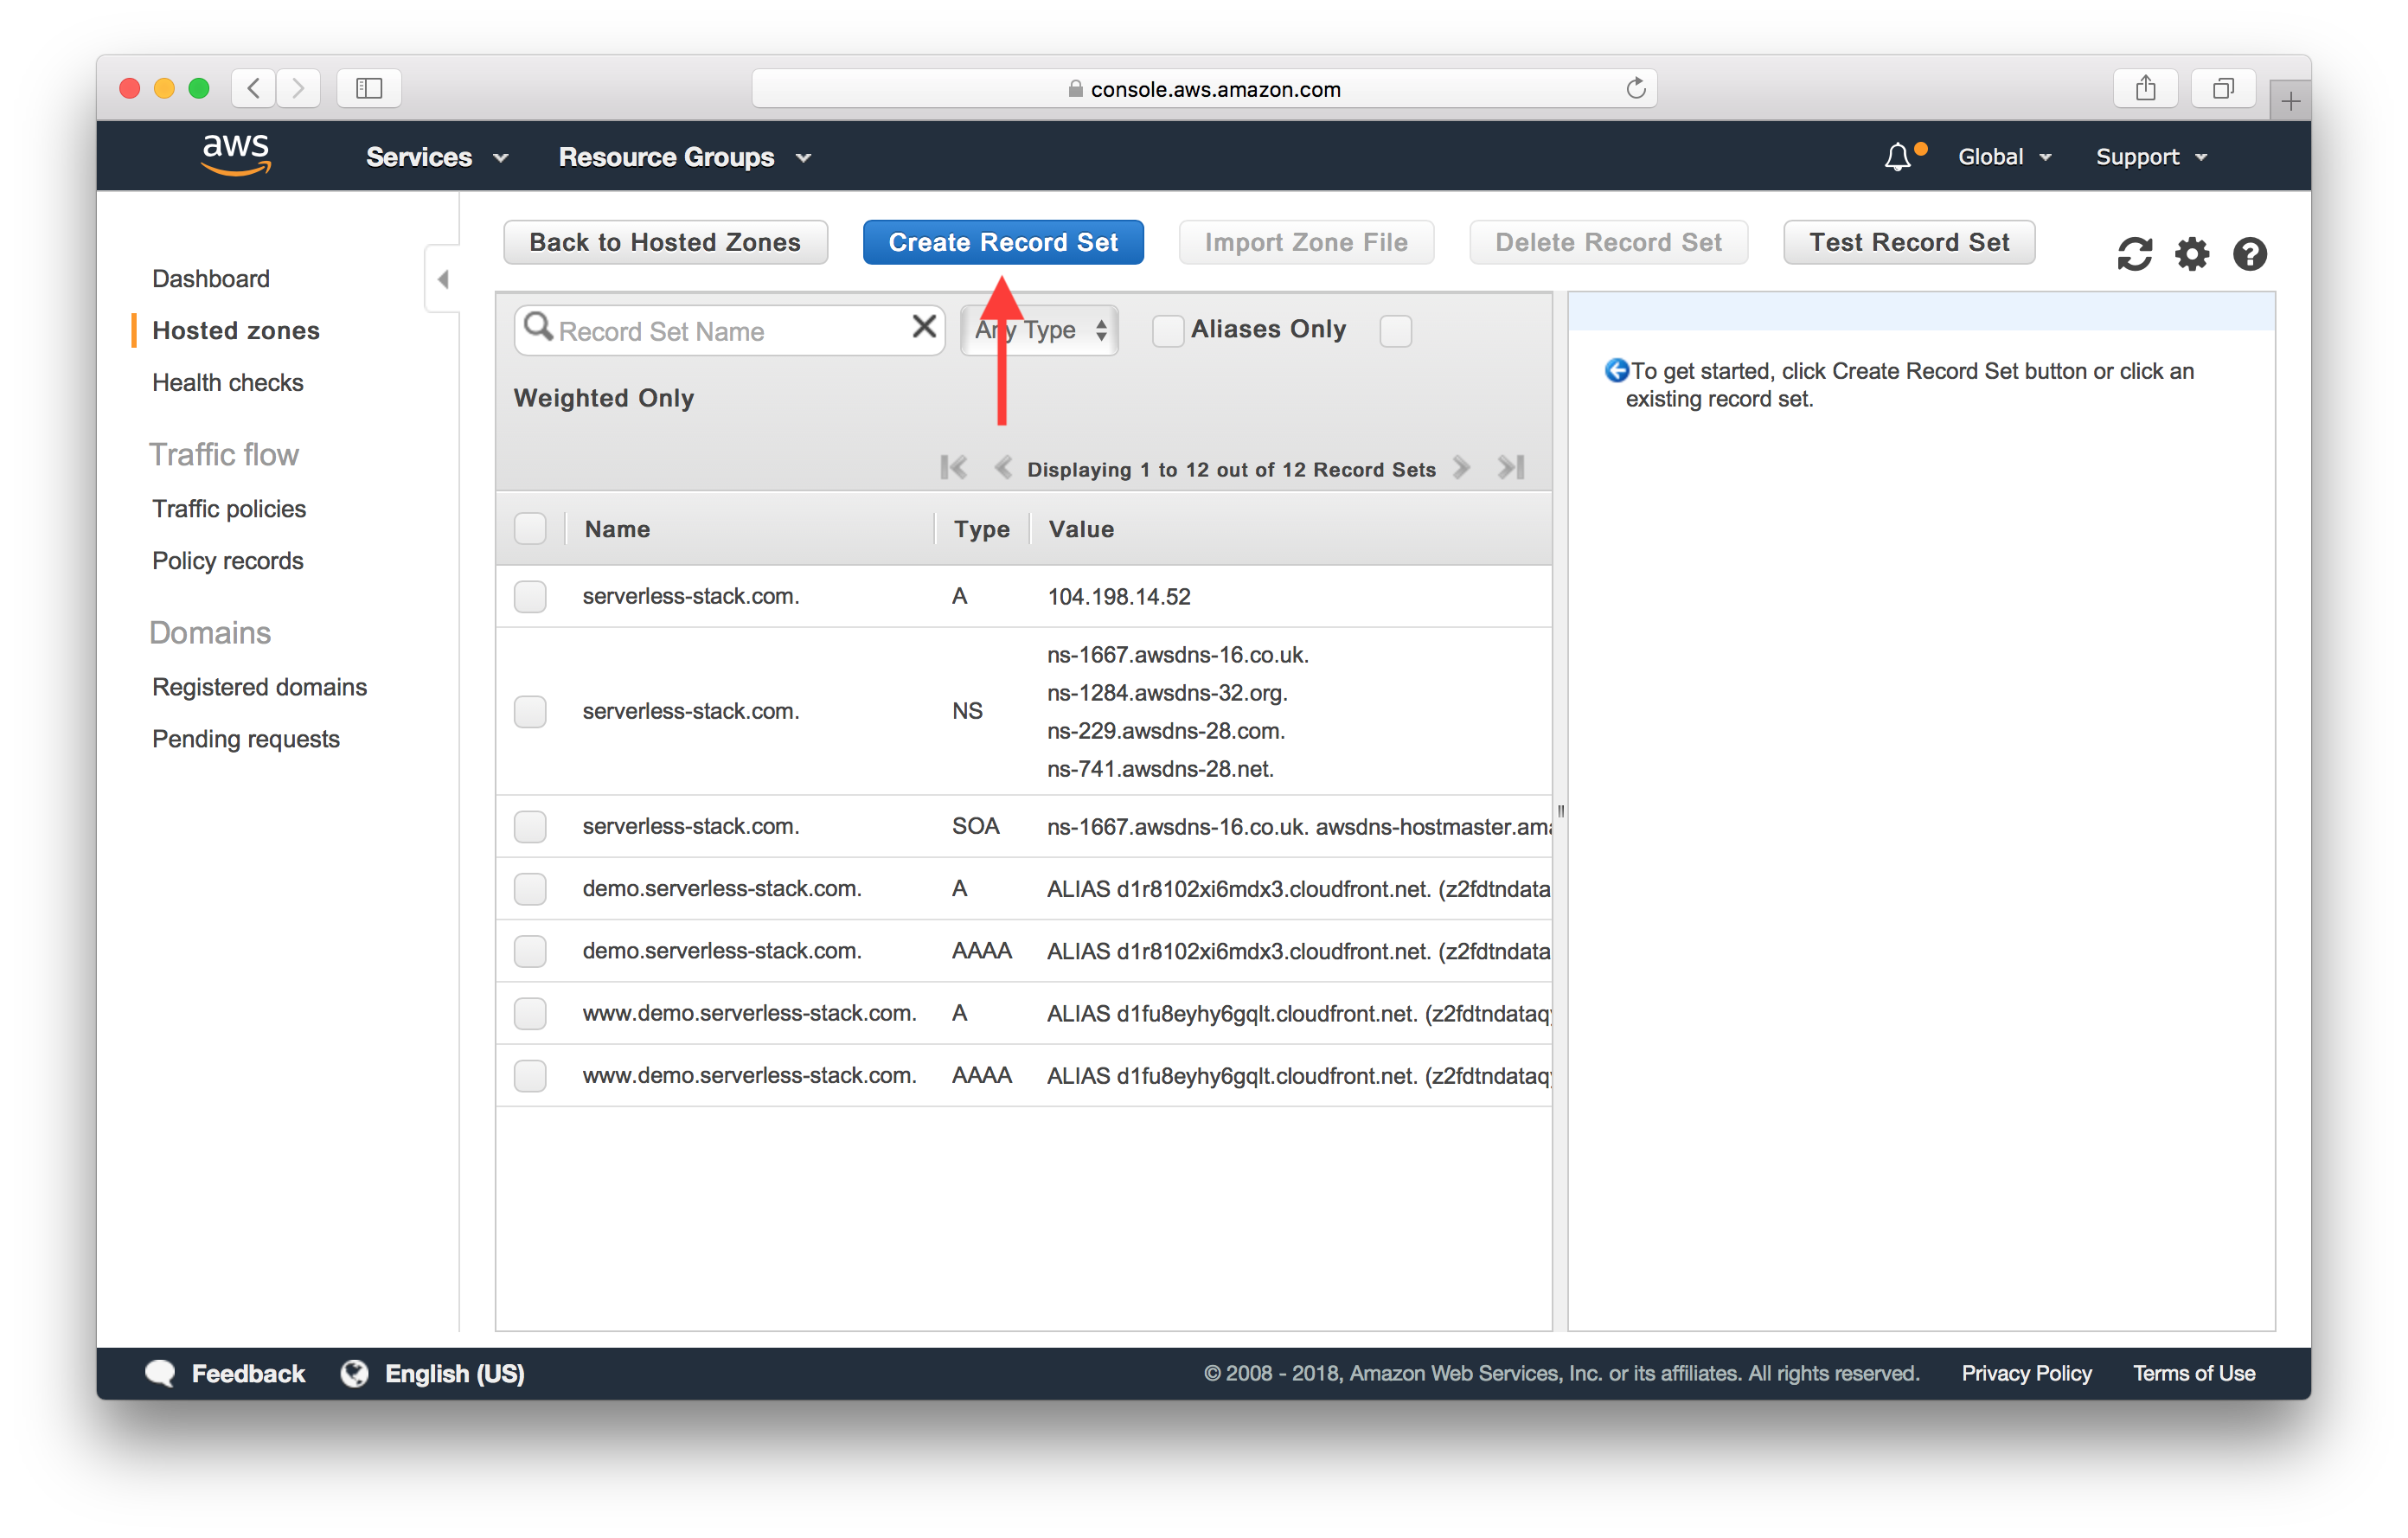
Here click on Create Record Set.
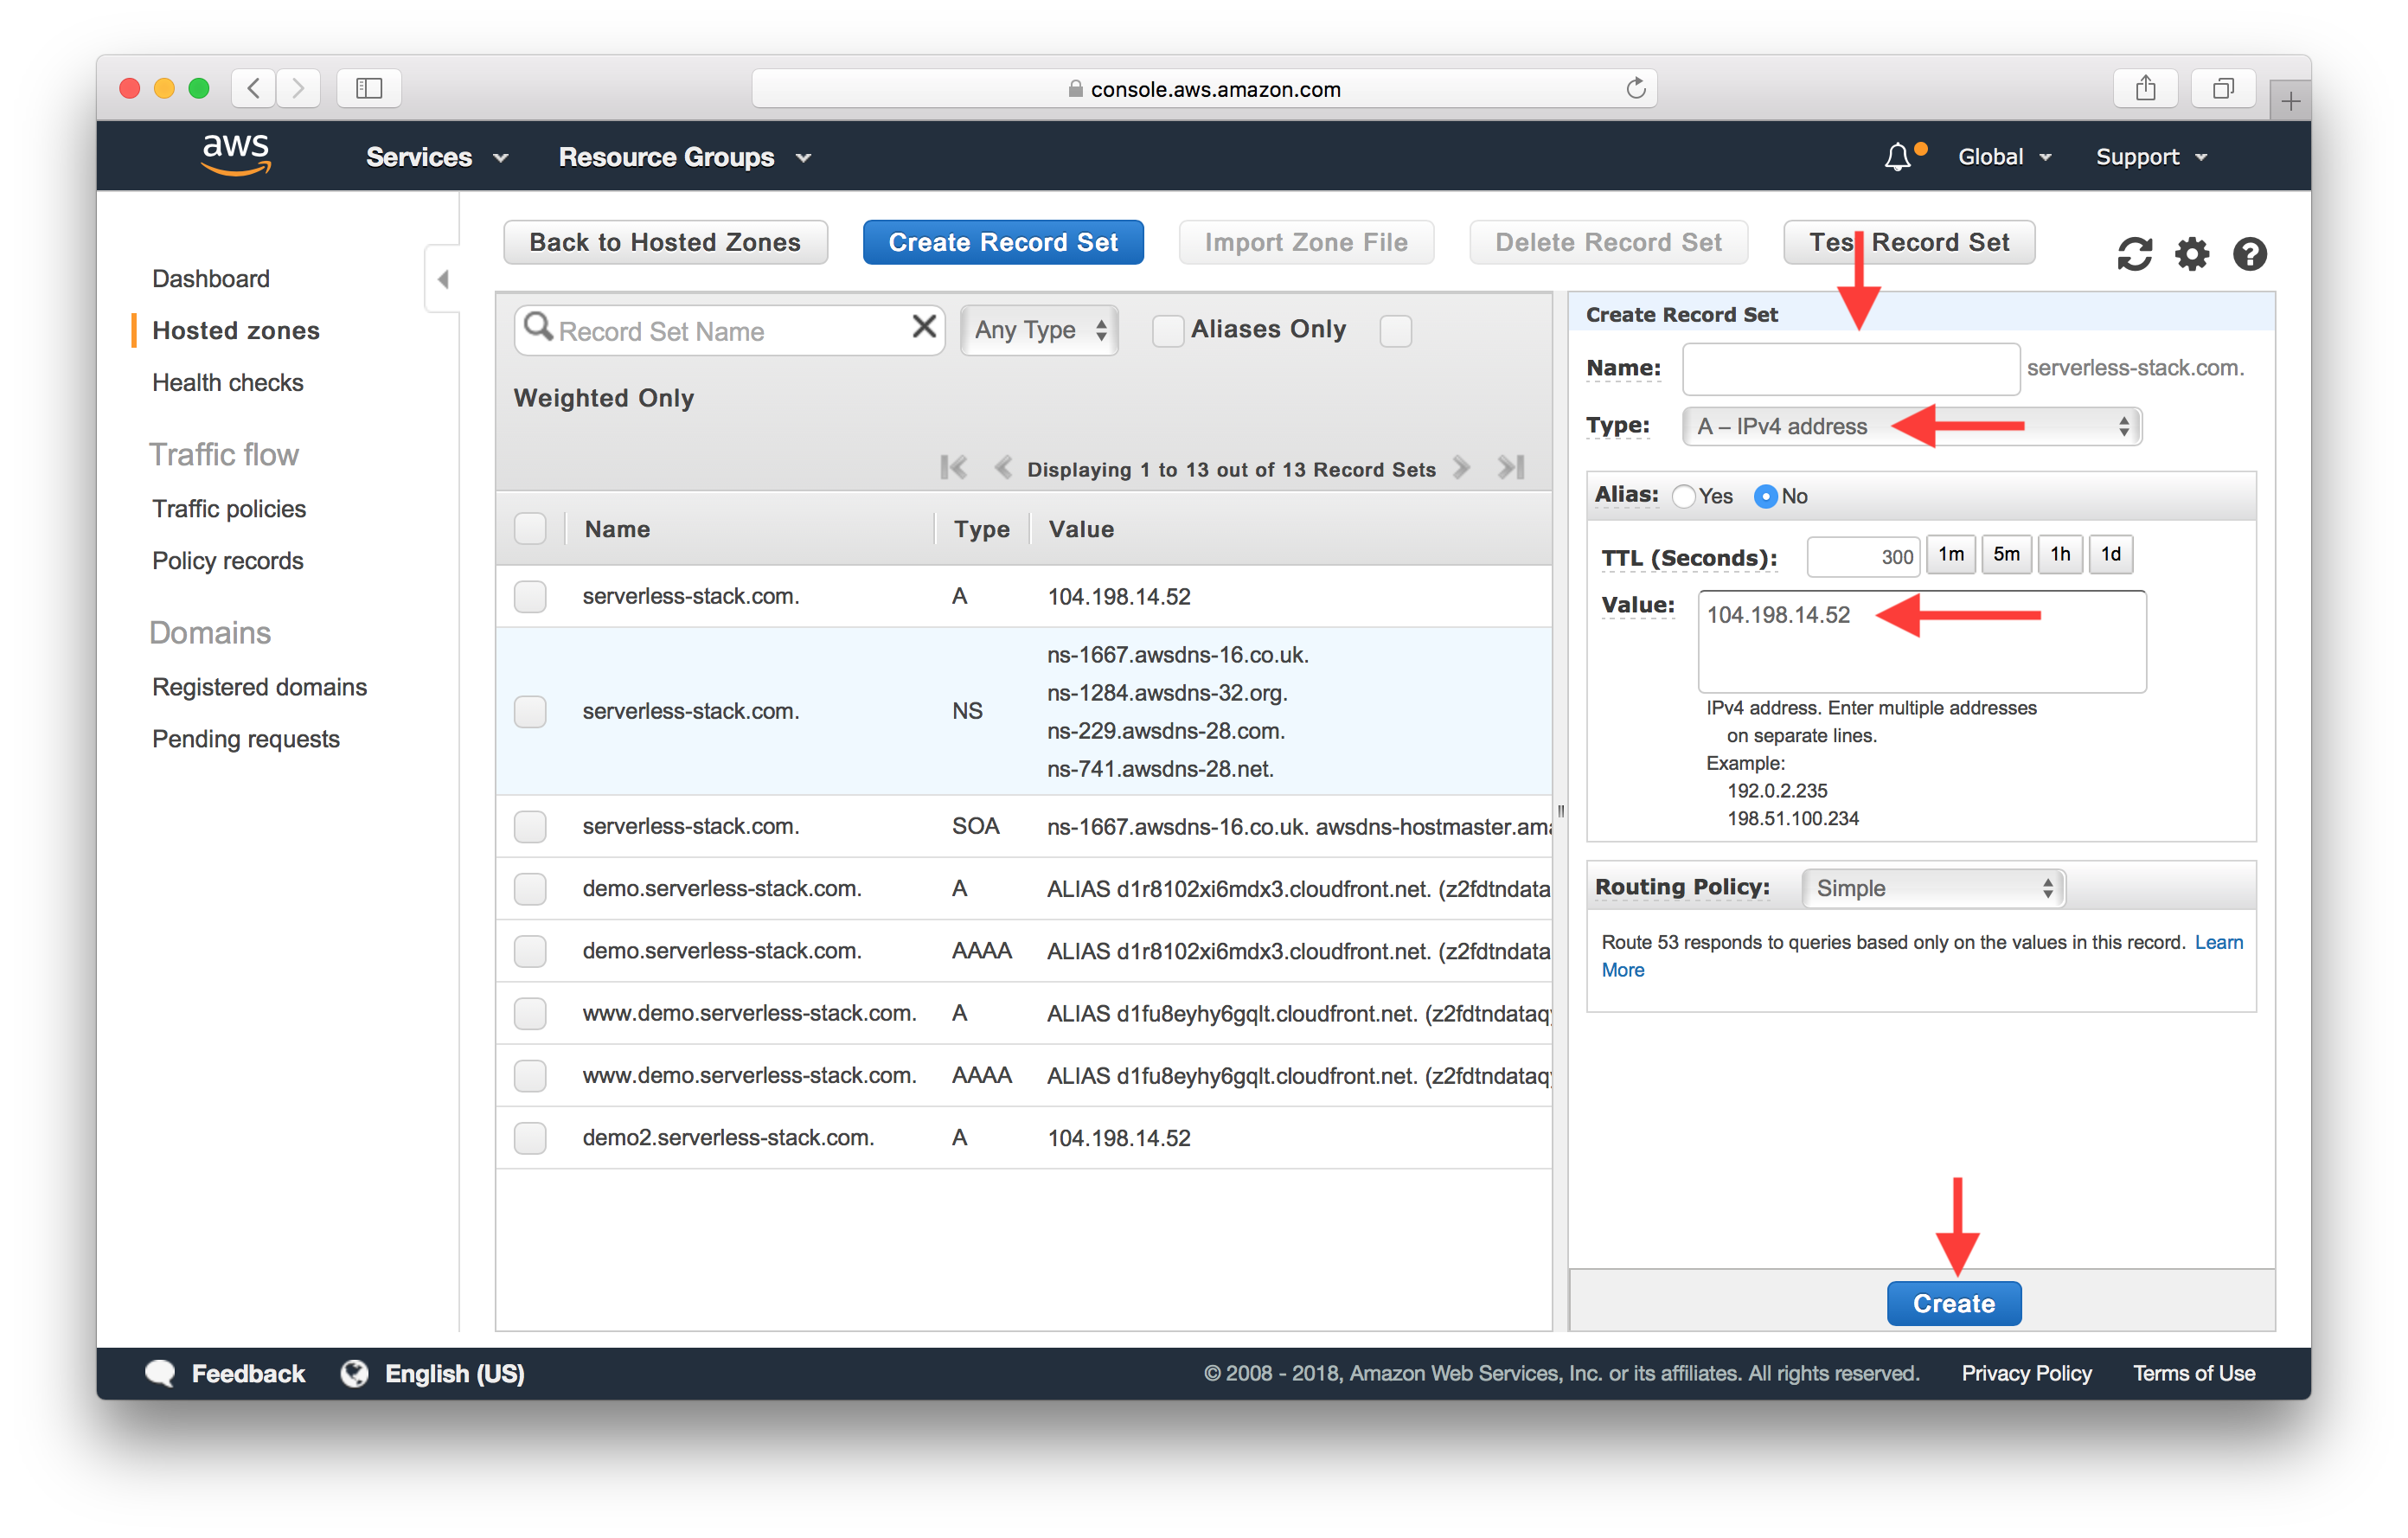
Select Type as A - IPv4 address and set the Value to 104.198.14.52. And hit Create. We get this IP from the Netlify docs on adding custom domains.
Next hit Create Record Set again.
Set Name to www, Type to CNAME - Canonical name, and the value to the Netlify site name as we noted above. In our case it is https://serverless-stack-2-client.netlify.com. Hit Create.
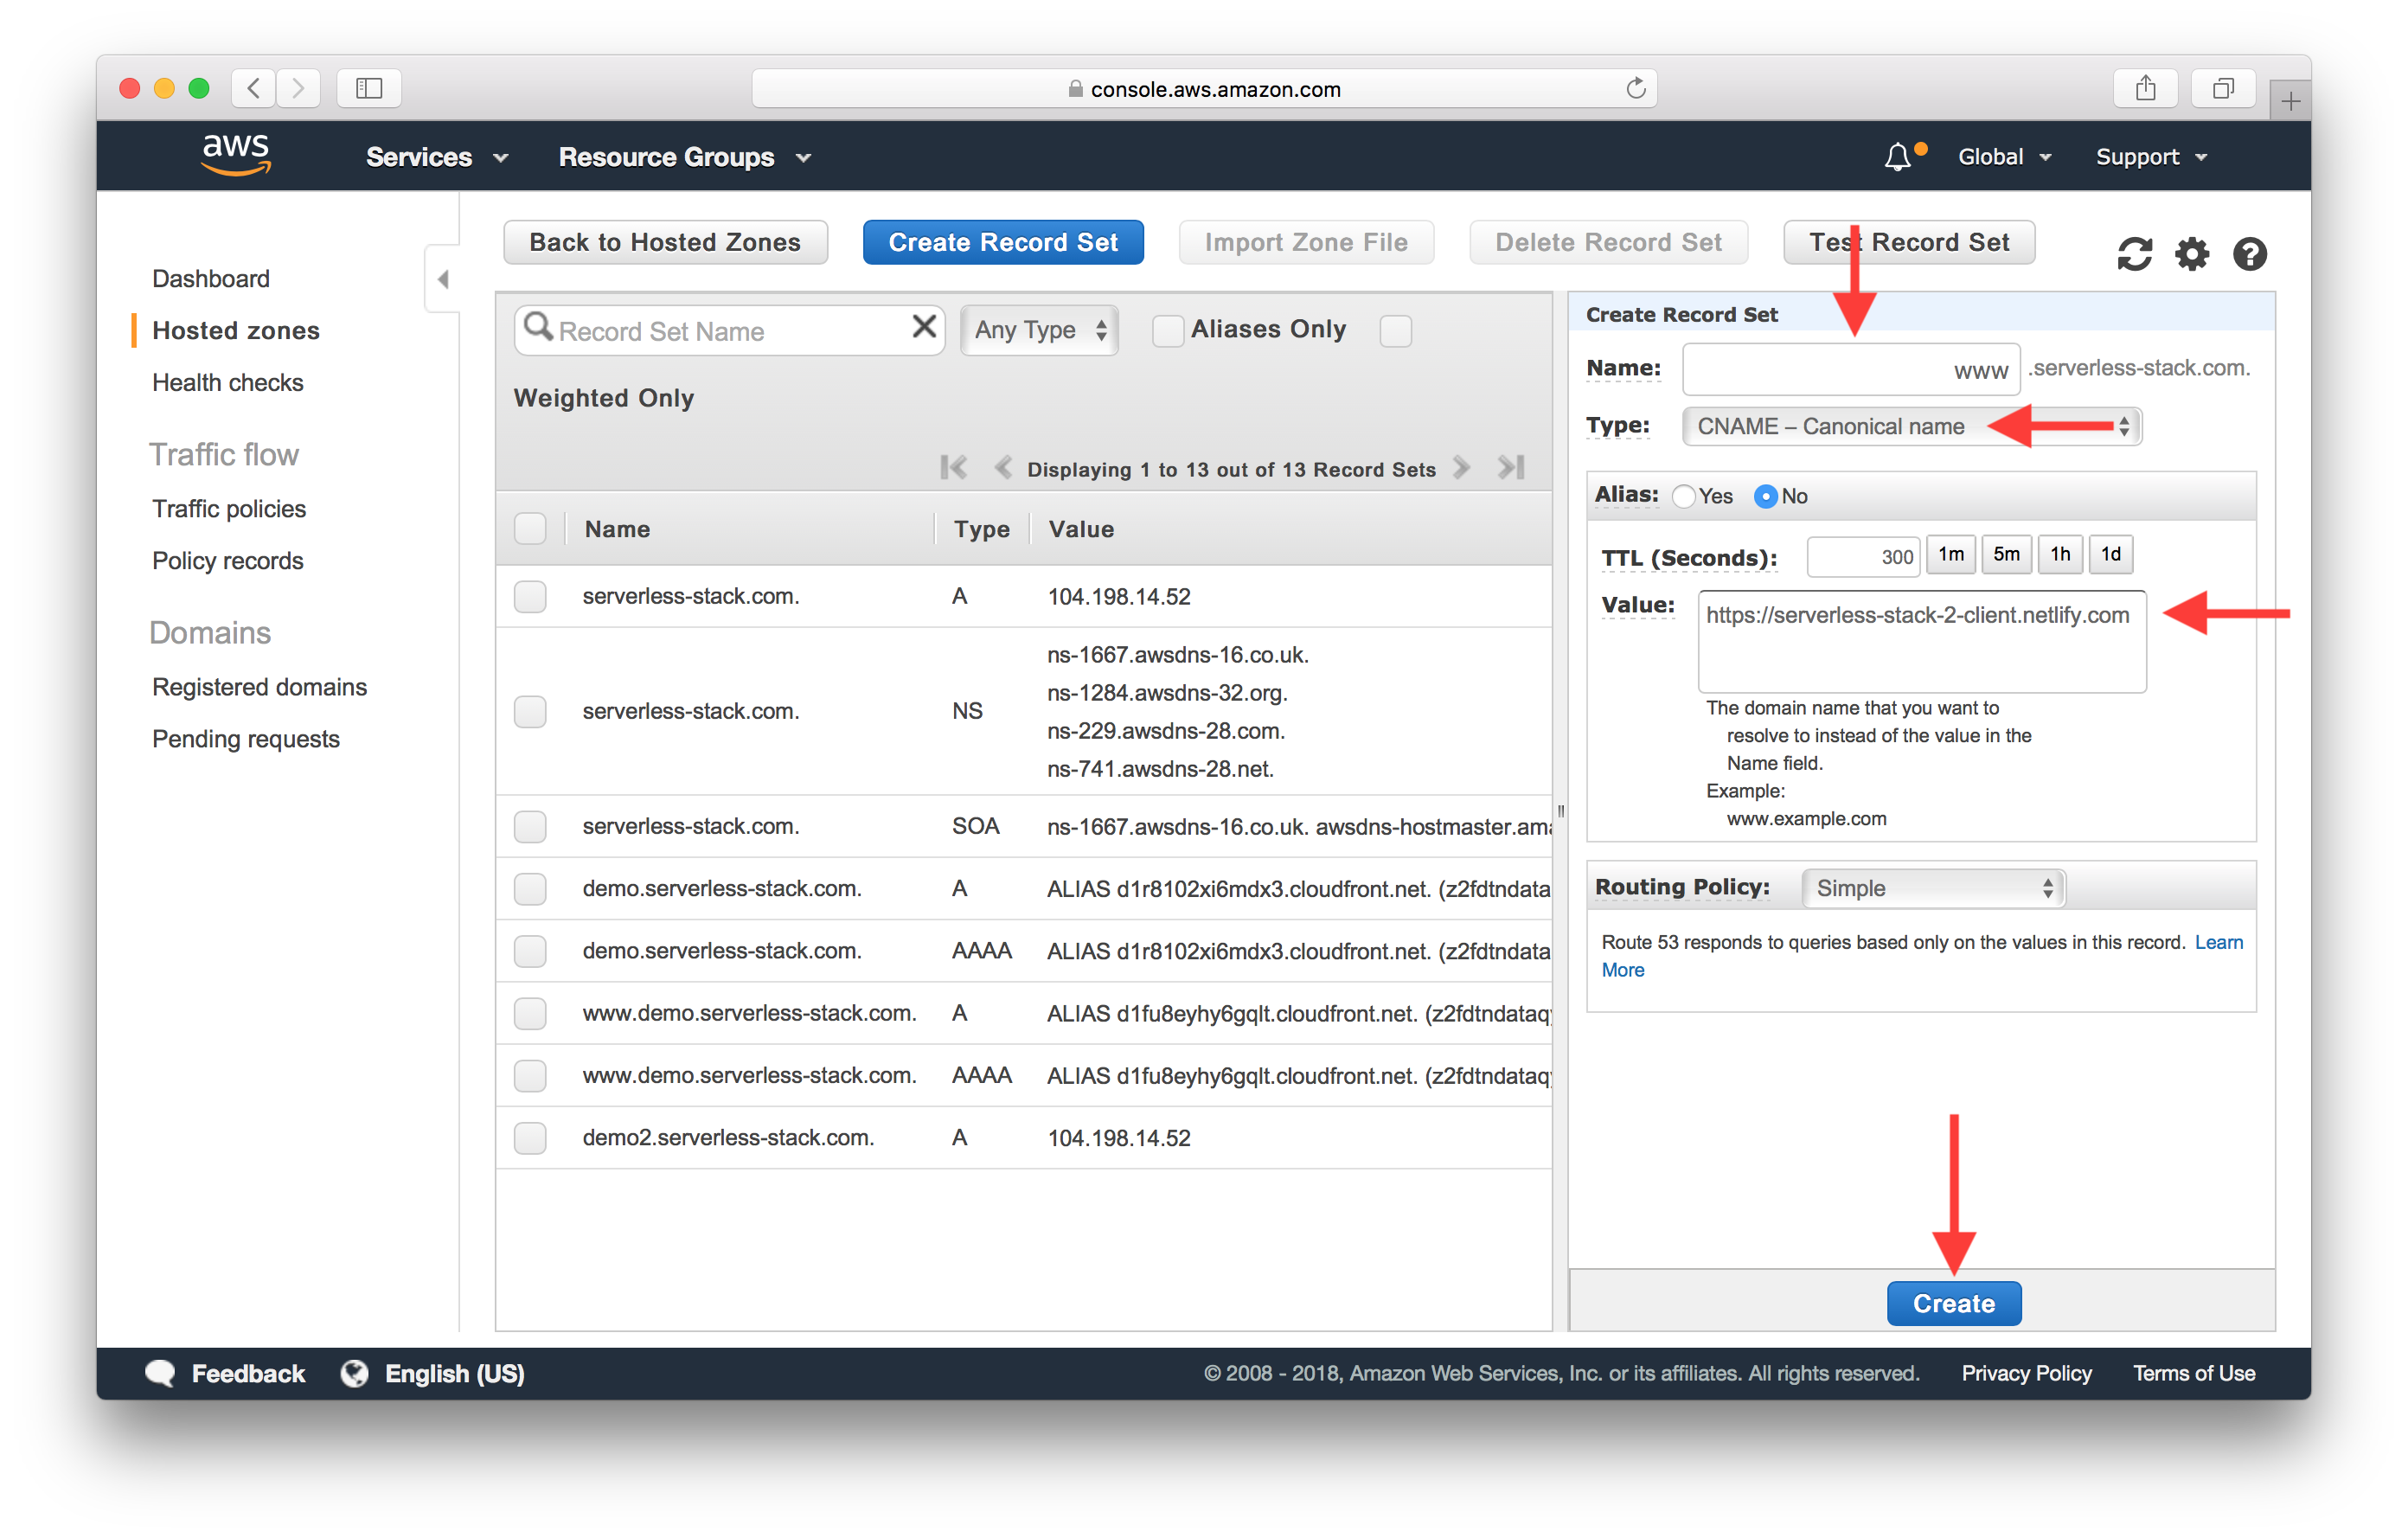
And give the DNS around 30 minutes to update.
Configure SSL
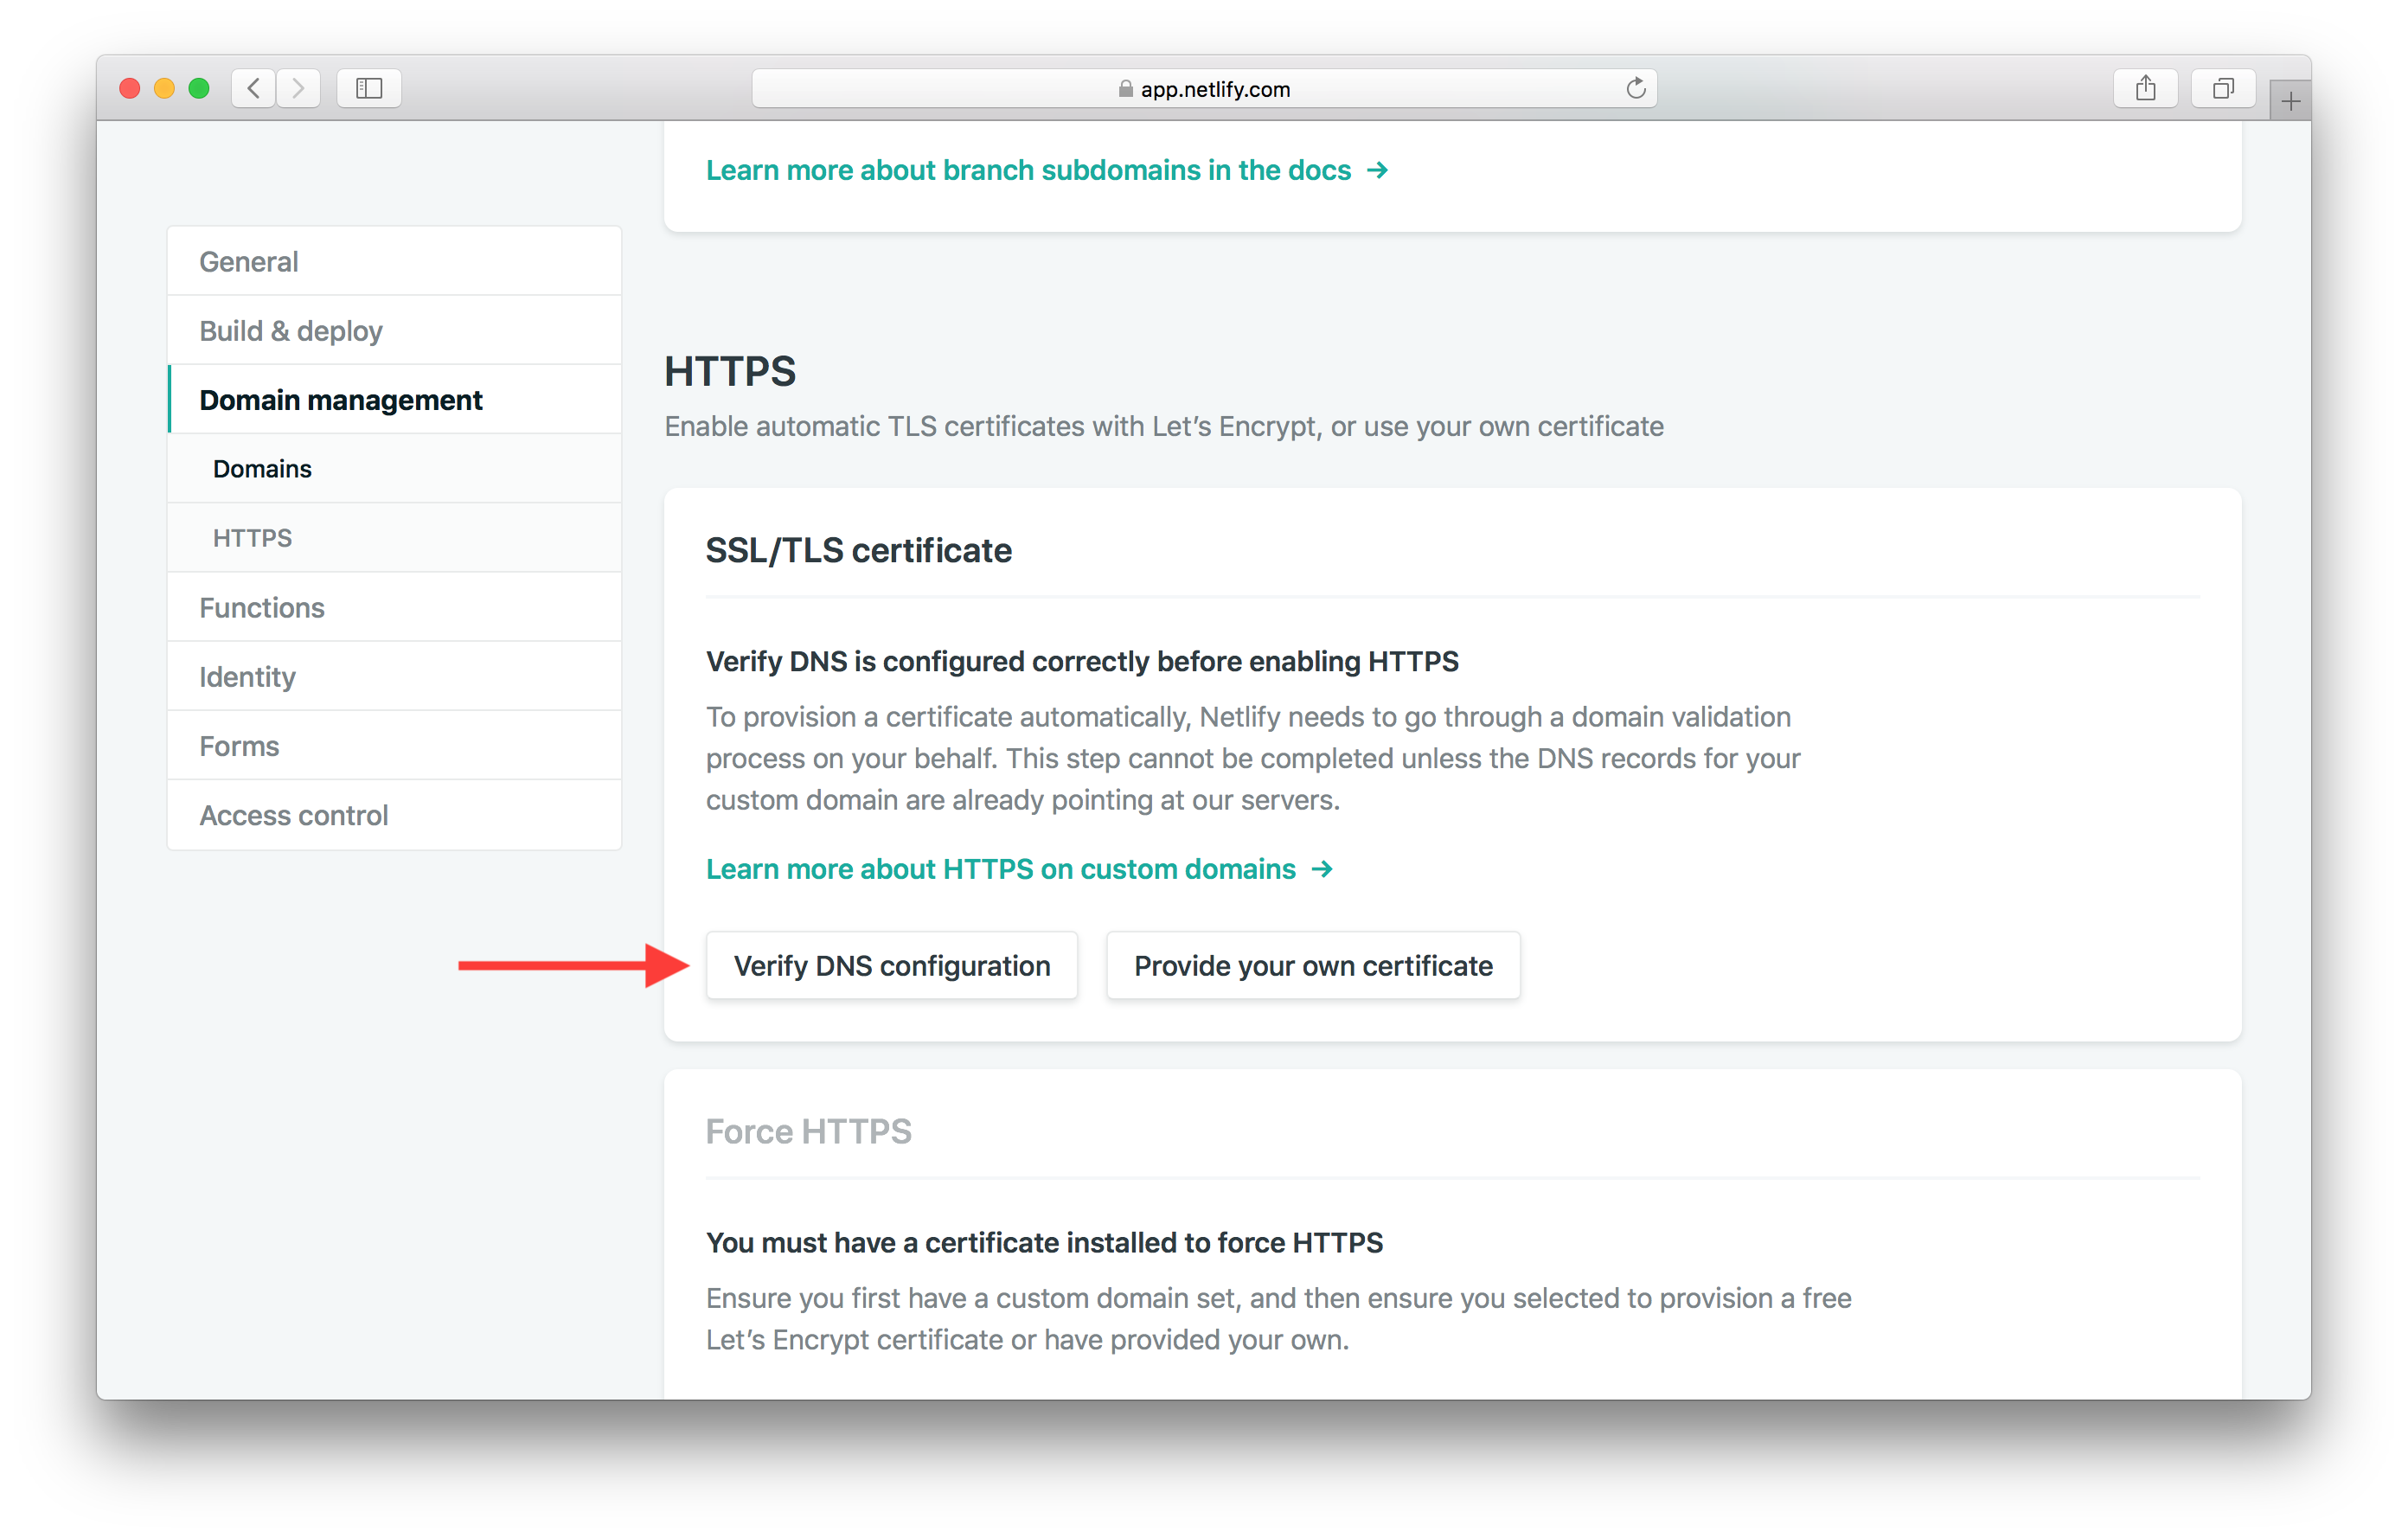
Back in Netlify, hit HTTPS in the side panel. And hit Verify DNS configuration.
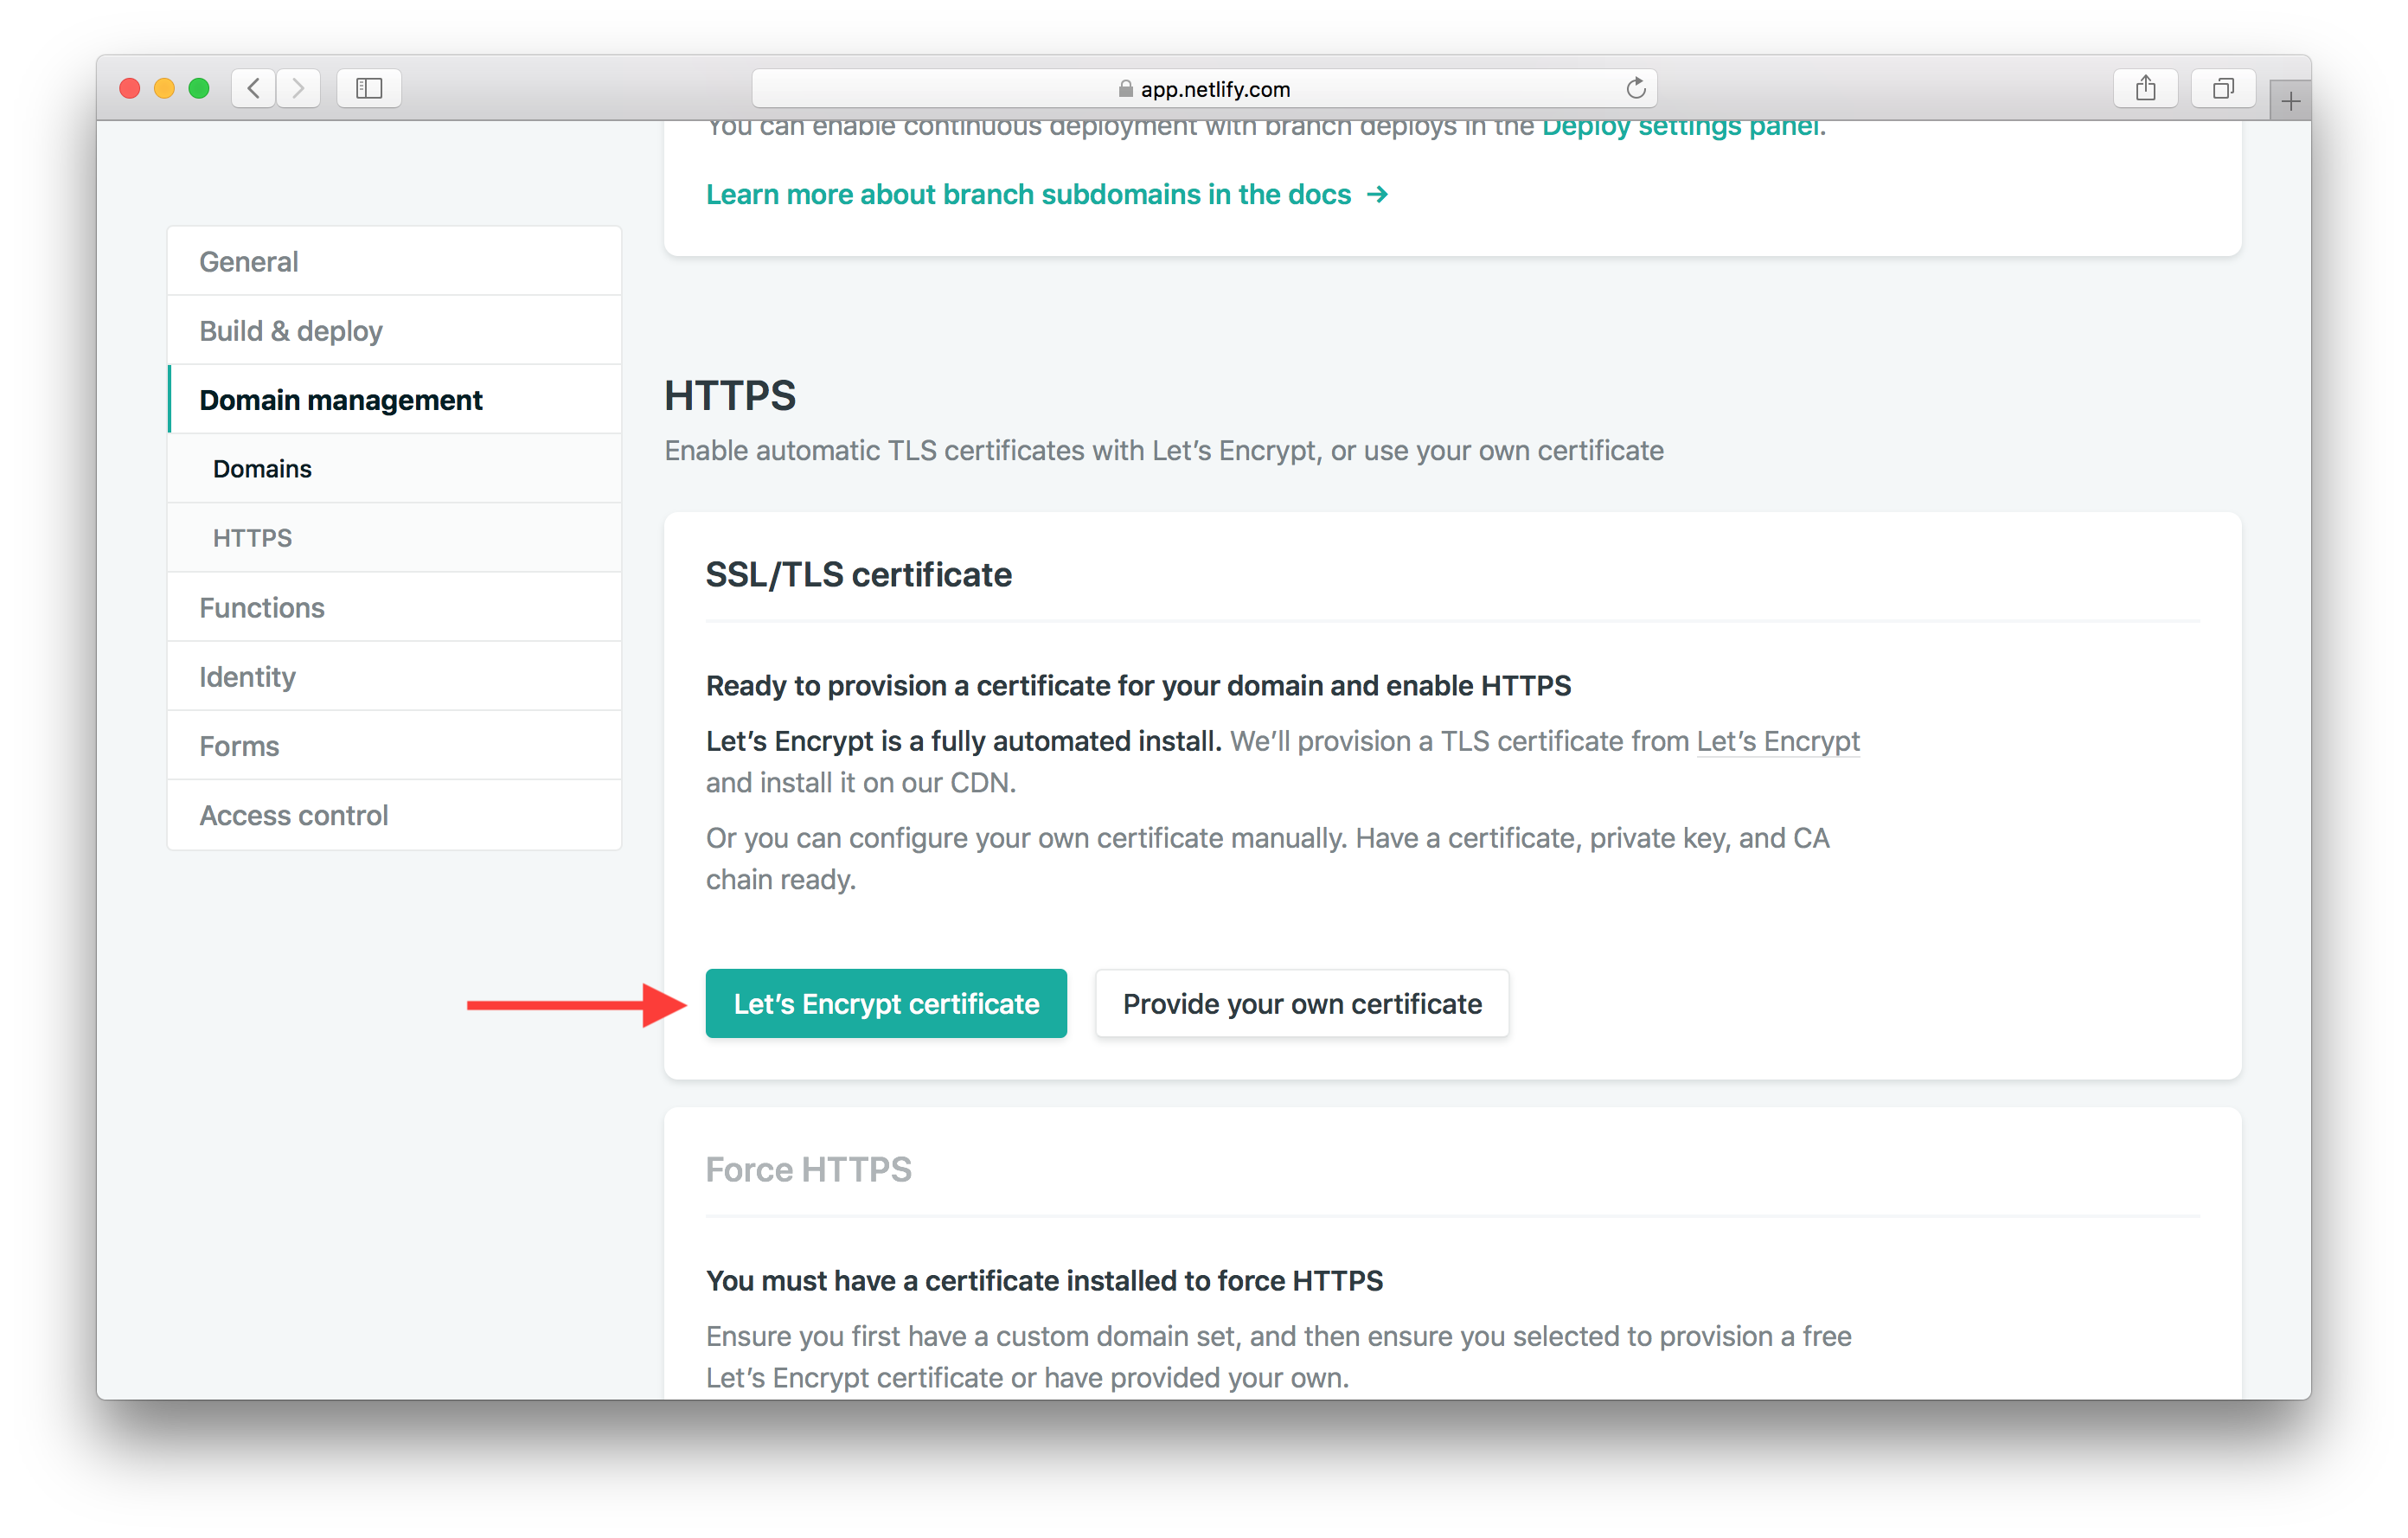
If everything has been configured properly, you should be able to hit Let’s Encrypt Certificate.
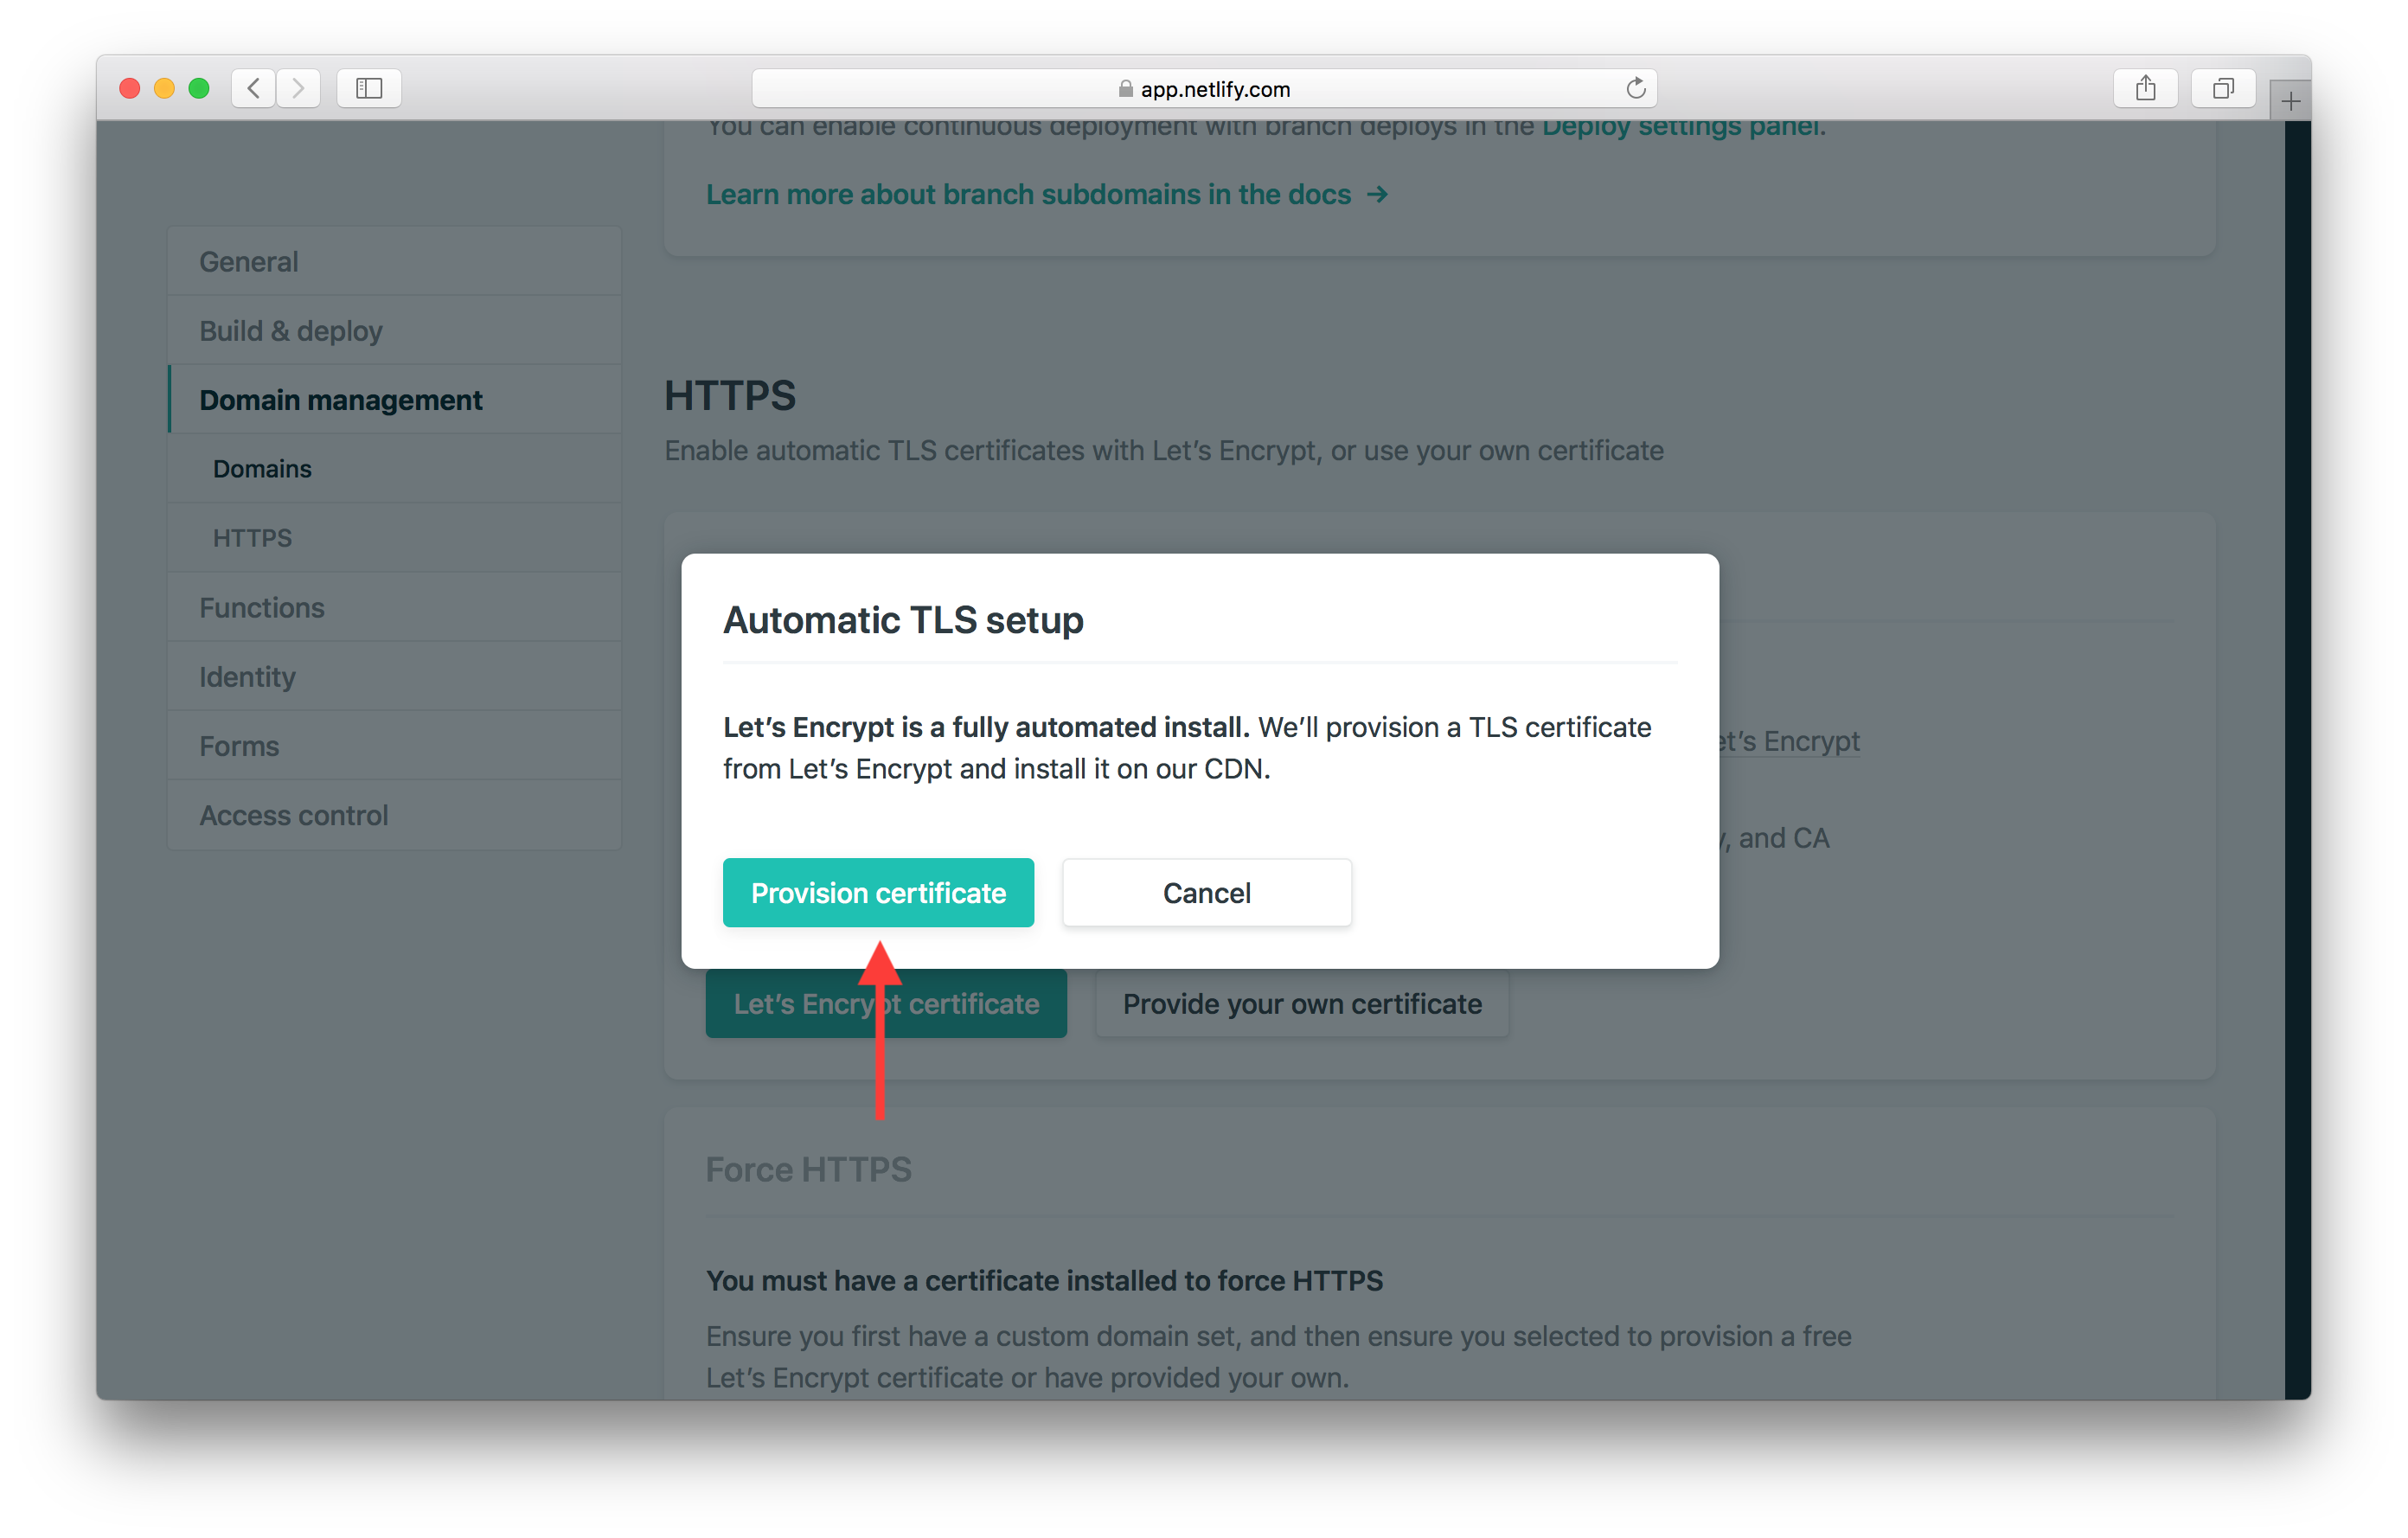
Next, confirm this by hitting Provision certificate.
This process might take around 10 minutes to complete. But once complete, scroll down and hit Force HTTPS.
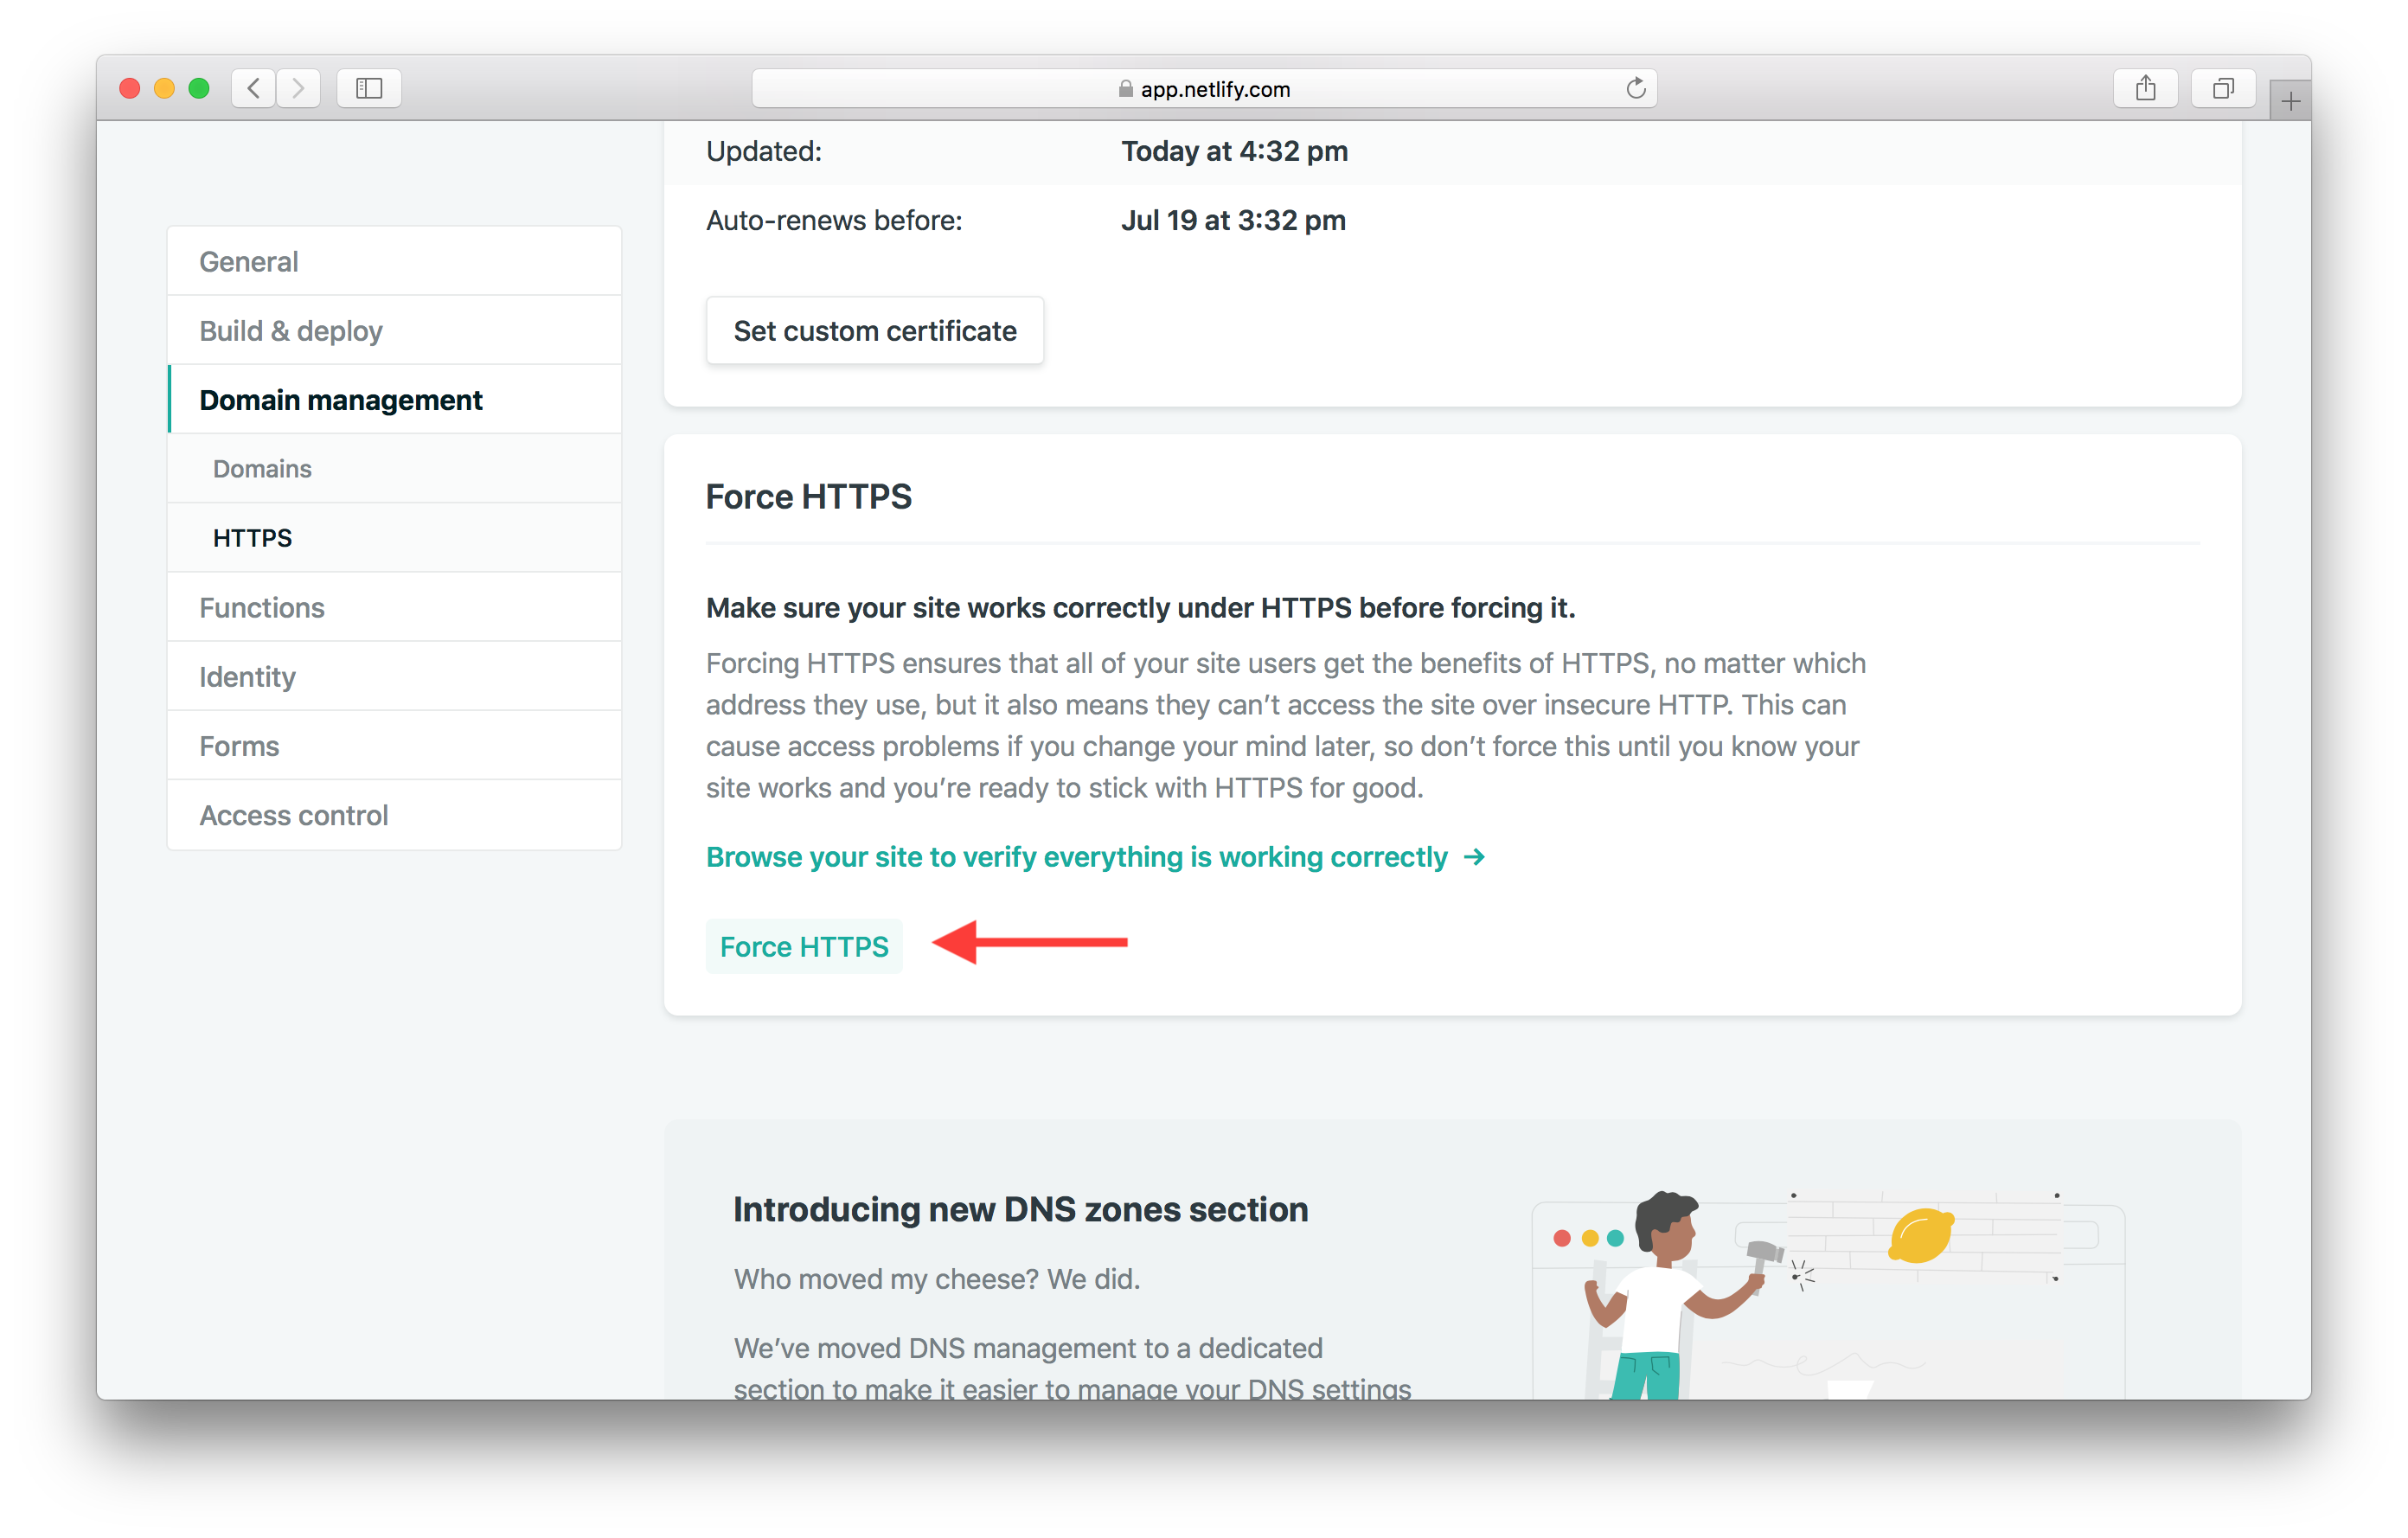
This forces your users to only use HTTPS to communicate with your app.
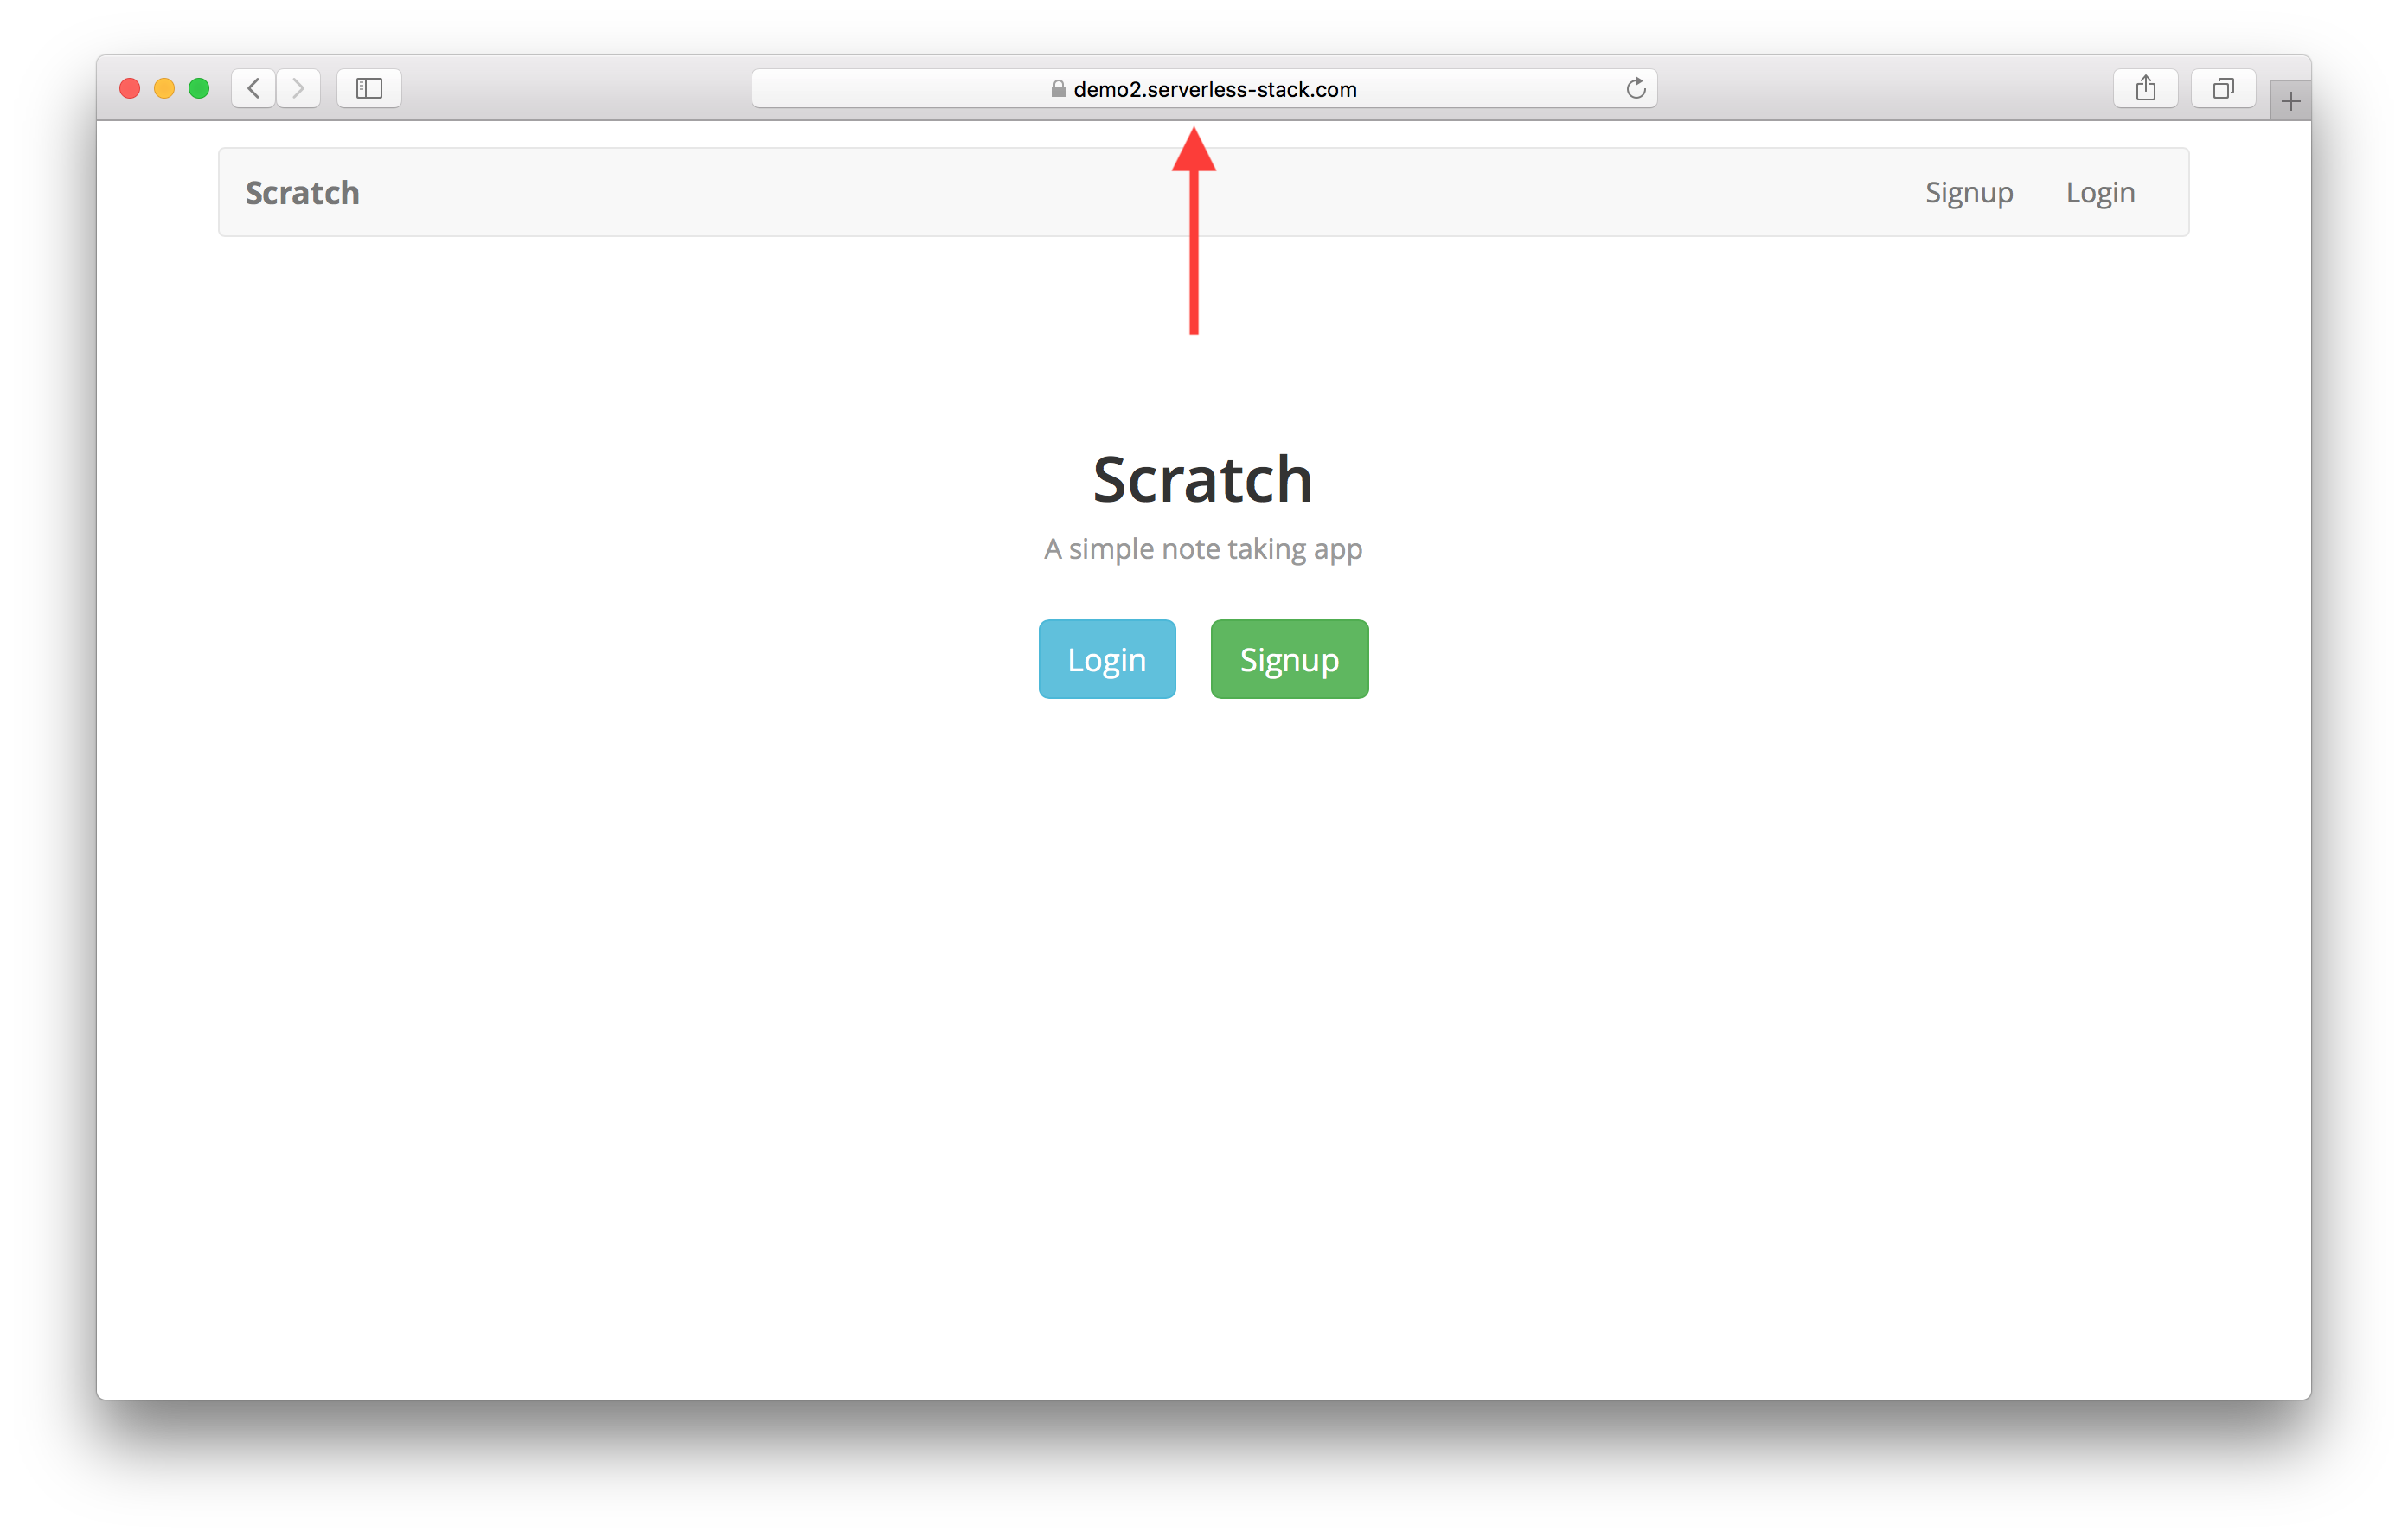
Now if you head over to your browser and go to your custom domain, your notes app should be up and running!
We have our app in production but we haven’t had a chance to go through our workflow just yet. Let’s take a look at that next.
For help and discussion
Comments on this chapterIf you liked this post, please subscribe to our newsletter, give us a star on GitHub, and follow us on Twitter.
Brought to you by
